Delete
Use the Delete option to delete files from TSM SmartClient folders. You can delete data files on 3 levels:
· TPA
· Group
· Plan
You can delete files on TSM SmartClient using the Delete option in one of two ways:
1. You can delete specific files from a selected folder.
2. You can use the Run System Delete Job function to delete all files older than the number of days specified in the System File Delete After Day(s) field.
**CAUTION: Once you initiate the Run System Delete Job process, ALL files for ALL plans older than the number of days specified will be permanently and irreversibly deleted.
How to Access this Option:
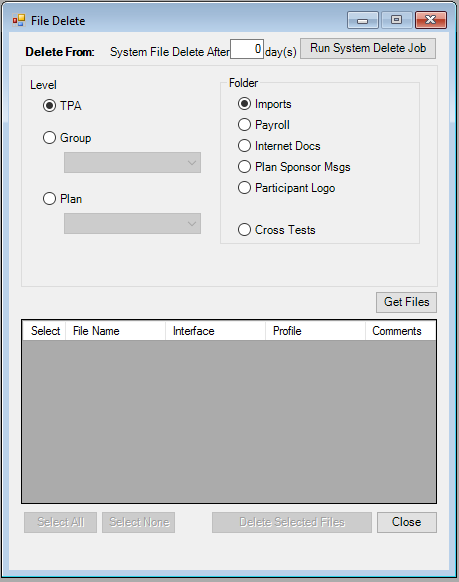
On the File menu, click Delete. The File Delete window displays.
How to Delete All System Files:
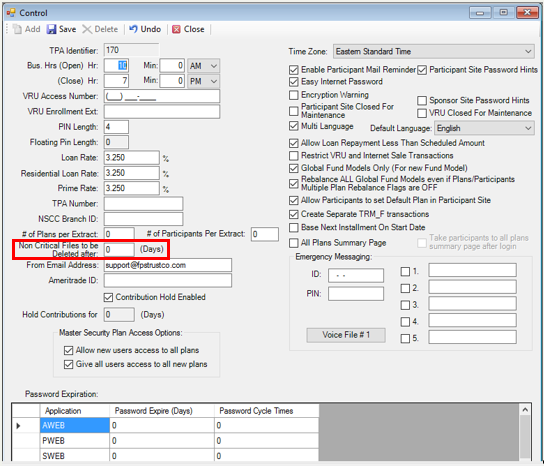
1. Look at the System File Delete After Days field. The number of days specified in this field corresponds with the number of days specified in the Non Critical Files to Be Deleted After field on the System Control window (Setup > System > Control). (The number of days in the System File Delete After Days field cannot be changed in the File Delete window. To change this value, the Non Critical Files to Be Deleted After field on the System Control window (Setup > System > Control) must be updated first.)
2. Click Run System Delete Job to begin the deletion process.
TSM SmartClient deletes all files older than the number of days specified in the System File Delete After Day(s) field, beginning with the oldest files first. If “0” is indicated, TSM SmartClient will delete all files.
EXAMPLE: If the value of ‘90’ is entered in the "Non Critical Files to be Deleted After Days" field on the Setup > System > Control screen and the current date is 3/1/2005, then all files with a date older than 12/1/2004 (i.e. 90 days prior to 3/1/2005) will be deleted when the Run System Delete Job button is clicked.
**CAUTION: If the Non Critical Files to be Deleted After Days field is not populated on the Setup > System > Control screen, and Run System Delete Job is clicked, TSM SmartClient will delete ALL uploaded files.
How to Delete Data Files:
1. In the [Delete From] section, select a desired Level (TPA, Group, or Plan).
2. If the Level selected is Group or Plan, pick a Group/Plan from the respective list.
3. Select the Folder where the file is located.
4. Click Get Files. A list of files will display in the File List grid.
5. Select the check box in the ‘Select’ column, next to the file(s) you want to delete or click Select All to select every file in the folder. You can also click Select None to clear all the check boxes.
6. When you are done, click Delete Selected Files to process the deletions. The following message displays:
Click Yes to delete them or No to retain them.
7. Click Close to exit this option.
Explanation of Fields:
|
Field Name |
Field Description |
Required / Optional |
|
Delete From |
System File Delete After xxx day(s) display (only) field, which indicates the "look back" period of time used to determine which files or jobs will be deleted. The xxx display value is actually populated via the Setup > System > Control screen, where the number of days value ("non critical files to be deleted after xxx(days)") is entered. |
Information Only |
|
Level |
Select the folder level from which you want to delete the file(s). TPA: The file is available at the global database level. Group: Select a group folder from the list. Plan: Select a plan ID from the list. |
Required |
|
Folder |
Imports: All of the
previously uploaded interface / conversion files are stored in this folder |
Required |