How to Assign a Statement Configuration to a Plan
Once you have configured your statement template, the next step is to assign a statement configuration to a Plan. The following process describes how to do that.
Use this procedure to assign a statement configuration to a Plan:
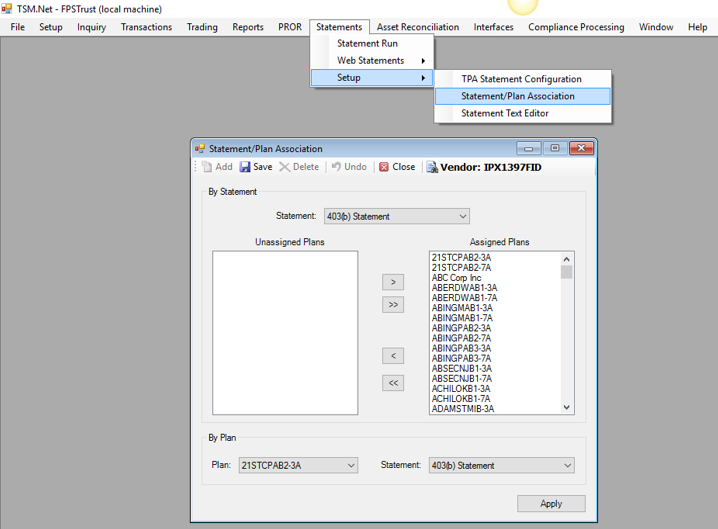
- Go to Statements > Setup > Statement/Plan
Association. The Statement/Plan Association window displays.
2. To assign a statement to a Plan, choose one of the following two options:
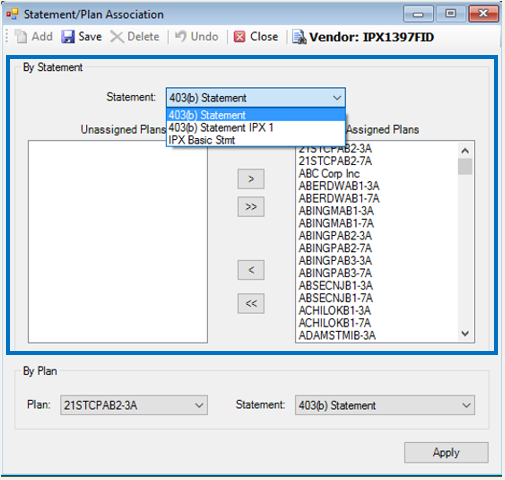
a. “By Statement” – You can select the statement and view the Plans assigned to that statement. Go to Step 3.
OR
b. “By Plan” - You can select a Plan and then view the statements available for it. Go to Step 5.
3. In the “By Statement” section, select the Statement from the drop down list. Any statement that has been configured and saved by the user will appear in this box.
4.
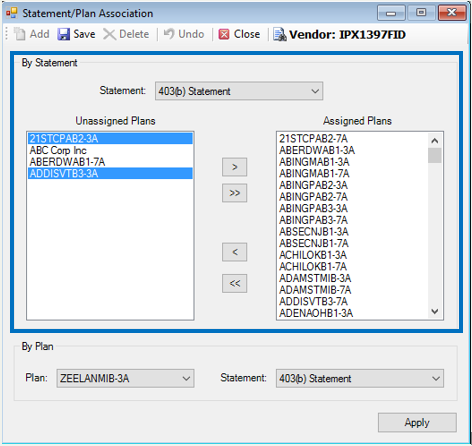
In the “Unassigned Plans” list, highlight the Plan you want to
assign to the statement and click the ![]() button to move that Plan to the “Assigned
Plans” list. (You can also remove an Assigned Plan by selecting the
corresponding Plan in the “Assigned Plans” list and clicking the
button to move that Plan to the “Assigned
Plans” list. (You can also remove an Assigned Plan by selecting the
corresponding Plan in the “Assigned Plans” list and clicking the ![]() button to move it to the “Unassigned Plans”
column.) Note: There can multiple Plans assigned
to a given statement. Go to step 7.
button to move it to the “Unassigned Plans”
column.) Note: There can multiple Plans assigned
to a given statement. Go to step 7.
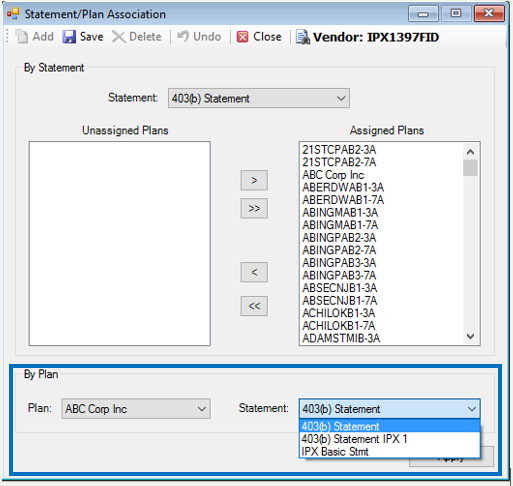
5. In the “By Plan” section, select the Plan you want to assign from the Plan drop down list.
6. Select the Statement from the Statement drop down list that you wish to assign to the selected Plan.
7.
Click the <Apply>
button or the ![]() icon to
apply/save the changes.
icon to
apply/save the changes.
The following message displays: