_______________________________________________________________________________________________________
How to Configure a Premium Statement Template
Use TPA Statement Configuration to format a statement and select the
information that will appear on it.
Note: Before you begin the configuration process, confirm that any plan
address and
plan logo has already been defined or uploaded, if required.
The following process describes how to configure a premium statement template.
The Premium Statement prints in Portrait mode.
Use this procedure to configure a premium statement template:
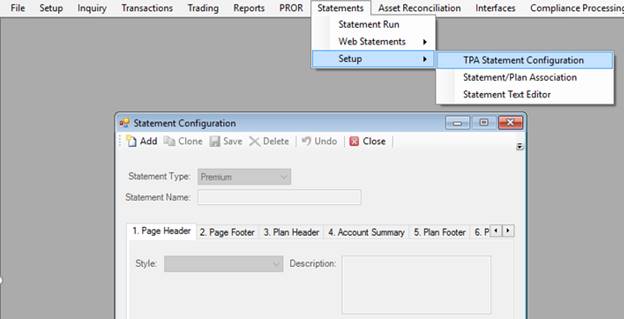
1. Go to Statements > Setup > TPA Statement Configuration. The Statement Configuration window displays.
1.
Click the ![]() icon.
icon.
2. Select Premium as the Statement Type from the list.
3. Enter a Statement Name. This field can contain both alpha and numeric characters, for example, ‘Test Premium Statement 1’.
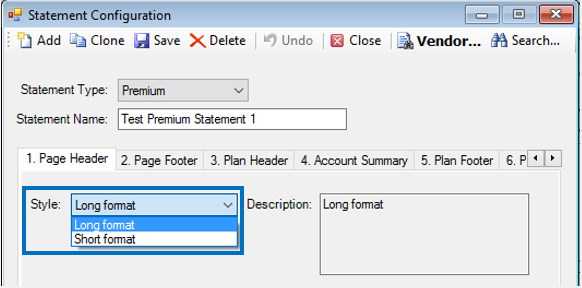
5. Click the 1. Page Header tab to define how the plan information will appear at the top of each statement page, beginning on page 2.
Page Header tab
You can select Style: Long Format or Style: Short Format.
Long Format displays Participant ID, Participant Name, Plan ID and Plan Name.
Short Format displays the Participant Name only.
The following are examples of each Style option:
This is how the Long format Style
will appear on the statement, beginning on page 2:
![]()
This is how the Short format Style will appear on the statement, beginning on page
2:
![]()
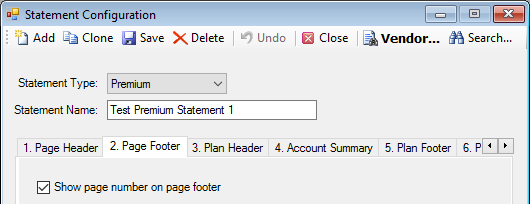
6. Click the 2. Page Footer tab if you want to print page numbers on the statements. Otherwise, go to Step 7.
Page Footer Tab
To display page numbers, select the Show page number on page footer check box. The page numbers will appear in the lower right corner of the statement.
Note: Page numbering begins on page 2 of the statement and continues on all subsequent pages.
The following is an example of how page numbers will appear on the statement, beginning on page 2:
![]()
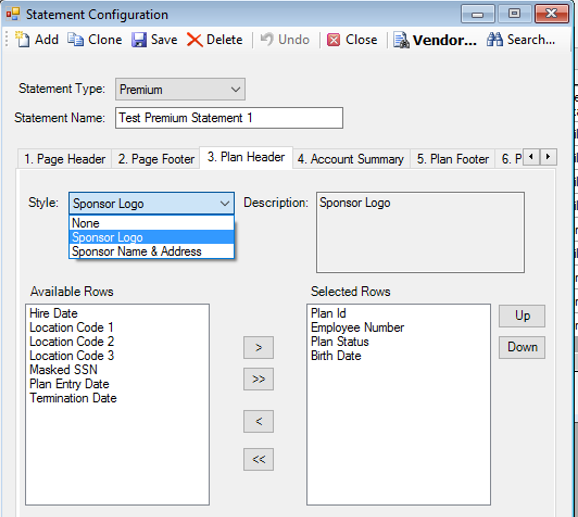
7. Click the 3. Plan Header tab.
Plan Header tab
Here you can choose to display a company logo or company return address on the upper left side of the first page of the statement. You can also select from available plan and participant data that will appear on the statement.
To display a logo: Select ‘Sponsor Logo’ from the Style list. Note: The Sponsor Logo uses the Plan Header Logo specified on the Setup > Plans > Plan > Statements tab for the Plan.
To display the Sponsor Name & Address: Select ‘Sponsor Name & Address’ from the Style list. Note: The Sponsor Name & Address uses the information on the Setup > Plans > Plan > Name / Address tab for the Plan.
You can also select additional Plan- and Participant-related data to display on the statement. All available fields appear in the Available Rows box.
To select a row, highlight it and
click ![]() to move the item to the
Selected Rows box.
to move the item to the
Selected Rows box.
To remove a row, highlight it in the Selected Rows box and click ![]() to move the item to the
Available Rows box.
to move the item to the
Available Rows box.
Note: The rows display on the statement in the order in
which they appear in the Selected Rows box. To change the order, highlight the
field, and click ![]() or
or ![]() to move its position.
to move its position.
The following are examples of each Style option:
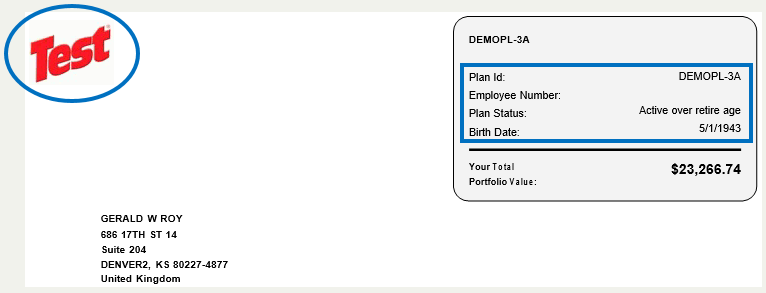
This is how the Sponsor Logo Style and
selected rows data will appear on the first page of the statement:
This is how the Sponsor Name & Address Style will appear on the first page of the statement:
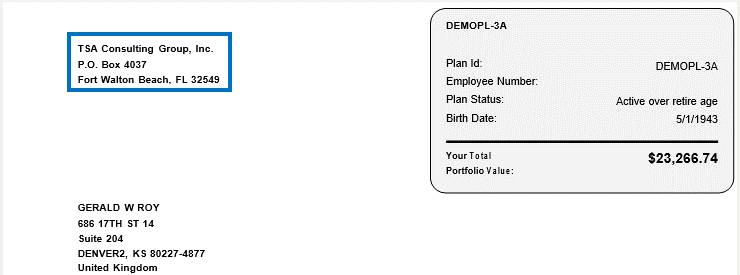
(Note: The address information is obtained from Setup > Plans > Plan > Name / Address tab.)
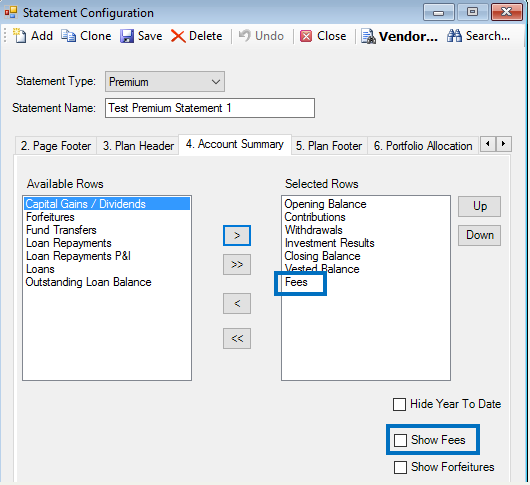
8. Click the 4. Account Summary tab.
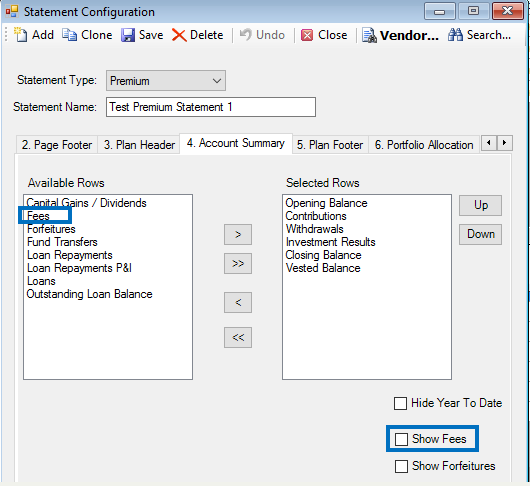
Account Summary tab
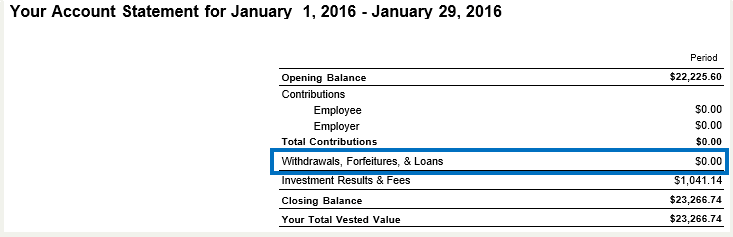
The Account Summary provides the participant with an overview of his account's performance for the statement period. This summary includes, but is not limited to, the opening balance, activity summary on a transactional level and closing balance for the statement period. You can also select the Show Fees and Show Forfeitures check boxes to display this information in the Account Summary.
Important Note: TSM SmartClient identifies contributions in the Account Summary section as Employee or Employer source/money types. Access the Setup > Plans > Contribution Sequence screen to view the Contribution type assignment.
You can specify the information
you want to include in the Account Summary section by selecting the options in
the Available Columns box. Highlight the desired row and click the ![]() button to move the
selection to the Selected Rows box. The fields appear on the statement in the
same order as in the Selected Rows box. To change the order, click the
button to move the
selection to the Selected Rows box. The fields appear on the statement in the
same order as in the Selected Rows box. To change the order, click the ![]() and
and ![]() buttons.
buttons.
Show Fees and Show Forfeitures
Note: These features work the same as in the Investment Activity and Source Summary sections.
The following describes the options available for reflecting fees and forfeitures in the Account Summary, Investment Activity, and Source Summary sections on the statement. Since there is a limit to the number of columns you can display, you may need to reflect fees and forfeitures within other selected columns.
Show Fees
You have three choices for displaying fees:
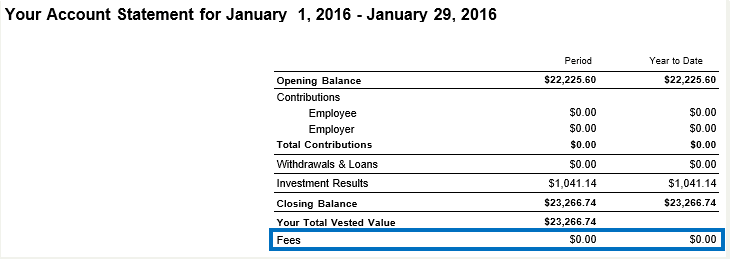
I. You can select to display the Fees row on the statement; it will appear as a separate line item in the Account Summary section. Do not select the Show Fees check box at the bottom of the window.
The following is an example of how fees will appear in the Account Summary section on the statement when this scenario is chosen:
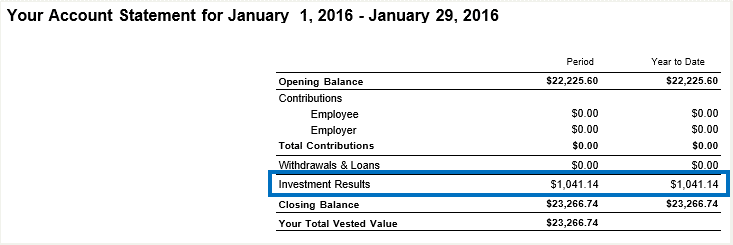
II. Although there are fee transactions for the plan, you do NOT choose Fees as a Selected Row and you do NOT select the Show Fees check box. Note: TSM SmartClient will include all fee transaction activity as part of the Investment Results line in the Account Summary section on the statement.
The following is an example of how fees will appear in the Account Summary section on the statement when this scenario is chosen:
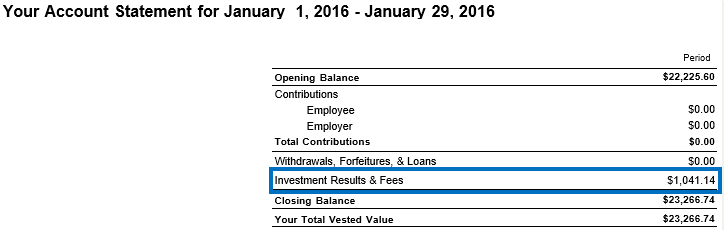
III. Select the Show Fees check box. Although there are fee transactions for the plan, you choose NOT to reflect fees as a Selected Row. You do, however, select the Show Fees check box. Note: TSM SmartClient will include all fee transaction activity as part of the Investment Results line in the Account Summary section on the statement.
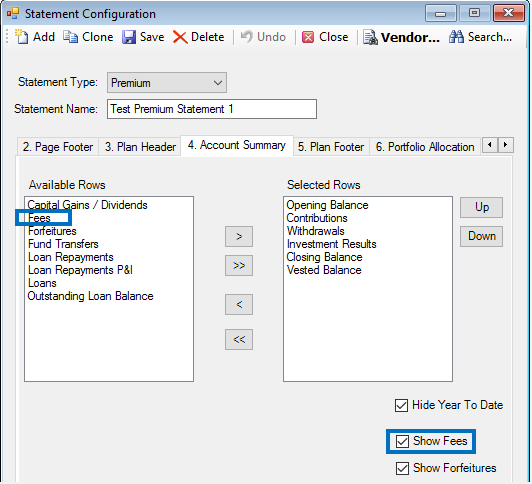
The following is an example of how fees will appear in the Account Summary section on the statement when this scenario is chosen:
Show Forfeitures
Show Forfeitures is also a labeling feature used to define how Forfeiture transactions are reflected in the Account Summary section on the statement. Like Show Fees, there are three available options:
I. When Forfeitures is selected as a Selected Column, it will appear as a separate column in the Account Summary section on the statement. There is no need to select the Show Forfeitures check box at the bottom of the page.
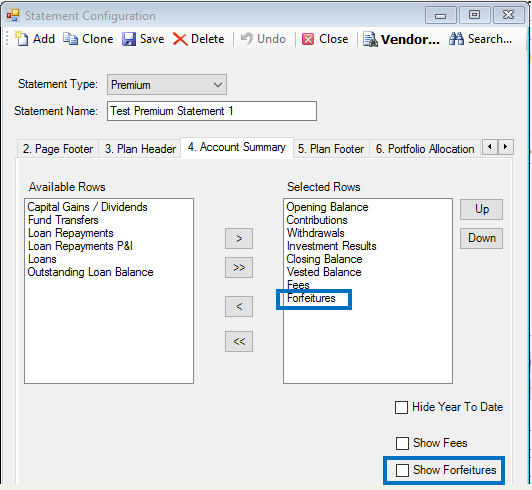
The following is an example of how forfeitures will appear in the Account Summary on the statement when this scenario is chosen:
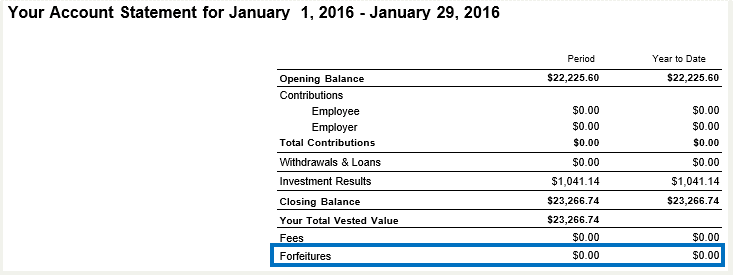
II. Although there ARE Forfeiture transactions in a plan, you do NOT choose Forfeitures as a Selected Row. Please note that TSM SmartClient will include all forfeiture transaction activity as part of the Withdrawals line in the Account Summary section on the statement. You also do not select the Show Forfeiture check box at the bottom of the page.

The following is an example of how forfeitures will appear in the Account Summary section on the statement when this scenario is chosen:
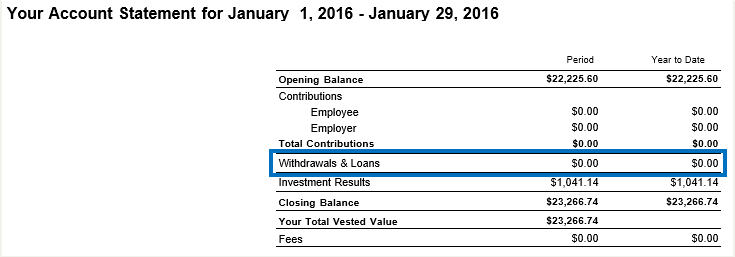
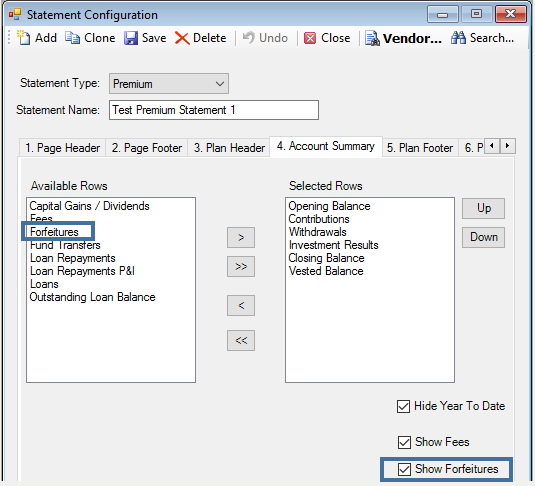
III. Select the Show Forfeitures check box. Although there ARE Forfeiture transactions in a plan, you do NOT choose Forfeitures as a Selected Row. Please note the application will include all Forfeitures transaction activity as part of the Withdrawals line in the Account Summary section on the statement.
The following is an example of how forfeitures will appear in the Account Summary section on the statement when this scenario is chosen:
1. Click the 5. Plan Footer tab.
Plan Footer Tab
Here you can choose the footer style and enter plan related information that will display at the bottom of the first page of the participant statement. The application includes a variety of styles and formats.
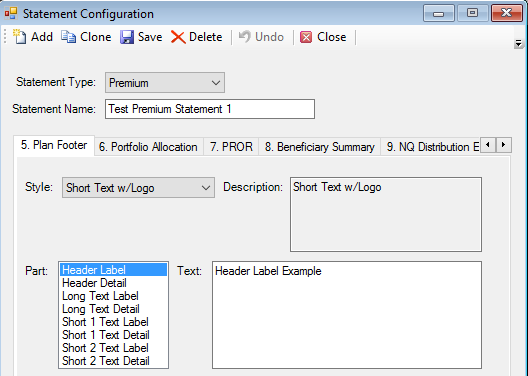
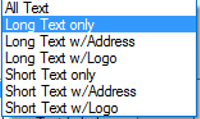
From the Style list, choose how you want to display the text and label information that you entered in the Text box. You can choose: ‘All Text’, ‘Long Text Only’, ‘Long Text w/Address’, ‘Long Text w/Logo’, ‘Short Text Only’, ‘Short Text w/Address’, or ‘Short Text w/Logo’.
Important Note: If ‘Long Text w/Logo’ or ‘Short Text w/Logo’ Style are selected, a Plan Footer Logo must also be selected on the Plans > Plan > Setup > Statements tab.
For one of these chosen Styles: ‘Short Text only’, ‘Short Text w/Address’, or ‘Short Text w/Logo’, in the Part section:
- Select ‘Header Label’ and enter the information in the Text box that you want to display.
- Select ‘Header Detail’ and enter the information in the Text box that you want to display.
- Select ‘Short 1 Text Label’ and enter the information in the Text box that you want to display.
- Select ‘Short 1 Text Detail’ and enter the information in the Text box that you want to display.
- Repeat steps III. and IV. for ‘Short 2 Text Label’ and ‘Short 2 Text Detail’.
Note: When any of the 3 ‘Short Text’ Styles are selected, text entered for the ‘Long Text Label’ and ‘Long Text Detail’ Parts will NOT be displayed.
For one of these chosen Styles: ‘Long Text only’, ‘Long Text w/Address’, or ‘Long Text w/Logo’, in the Part section:
- Select ‘Header Label’ and enter the information in the Text box that you want to display.
- Select ‘Header Detail’ and enter the information in the Text box that you want to display.
- Select ‘Long Text Label’ and enter the information in the Text box that you want to display.
- Select ‘Long Text Detail’ and enter the information in the Text box that you want to display.
Note: When any of the 3 ‘Long Text’ Styles are selected, text entered for the ‘Short 1 and 2 Text Label’ and ‘Short 1 and 2 Text Detail’ Parts will NOT be displayed.
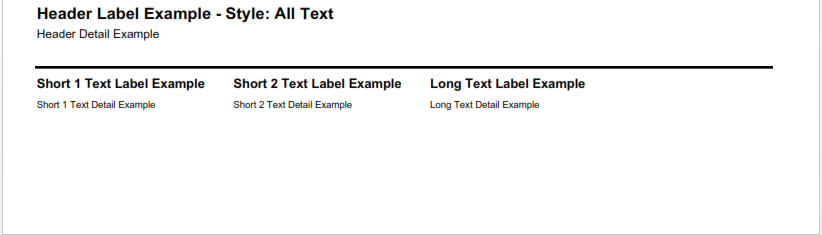
If the Style: ‘All Text’
is chosen, information can be entered in the Text box for any/all of the Parts
listed in the Part box that you want to display.
The following examples
show how this footer information (the text specified in the Part and Text
boxes) will be displayed with each Style option.
Style: All Text
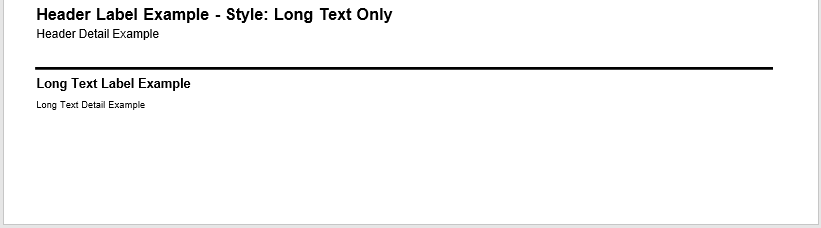
Style: Long Text Only
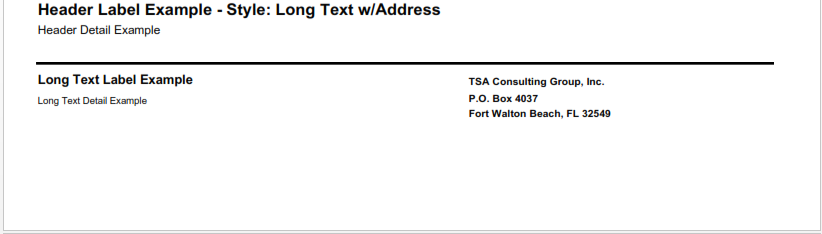
Style: Long Text w/Address (Note: The address information is obtained from Setup > Plans > Plan > Name / Address tab.)
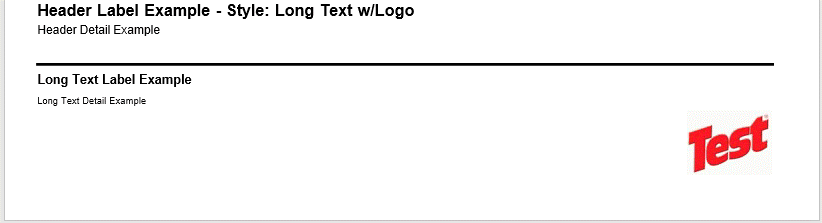
Style: Long Text w/Logo (Note: This style uses the Plan Footer Logo specified on the Setup > Plans > Plan > Statements tab for the Plan.)
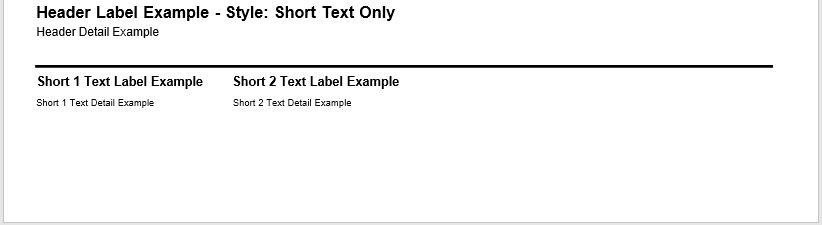
Style: Short Text Only
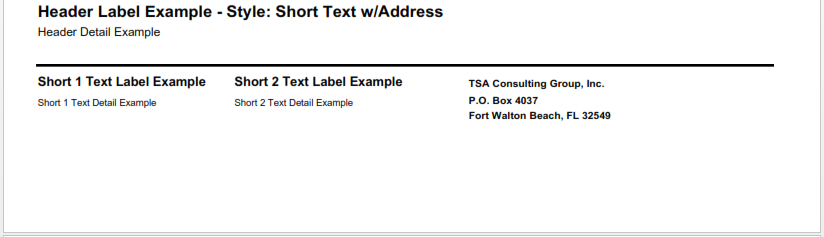
Style: Short Text w/Address (Note: The address information is obtained from Setup > Plans > Plan > Name / Address tab.)
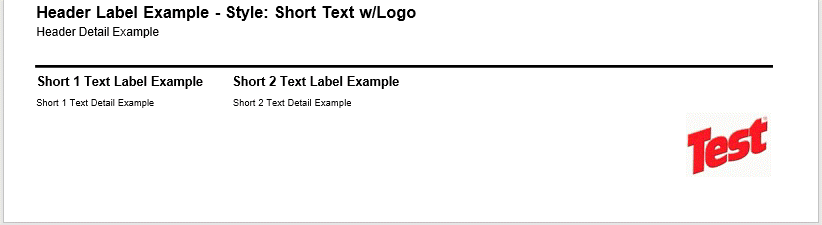
Style: Short Text w/Logo (Note: This style uses the Plan Footer Logo specified on the Setup > Plans > Plan > Statements tab for the Plan.)
Please note: For any chosen Style, if text is not entered for a related corresponding Part(s), that/those respective section(s) on the statement will be blank.
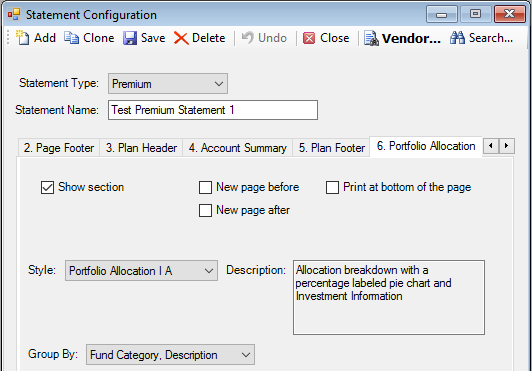
10.Click the 6. Portfolio Allocation tab.
Portfolio Allocation Tab
The Portfolio Allocation section is an optional section that reflects the participant's investments as they relate to the total portfolio market value.
Select the Show section check box to
include this section on the statement.
There are 12 styles from which to choose:
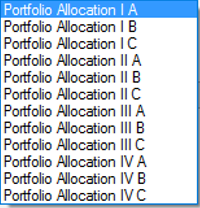
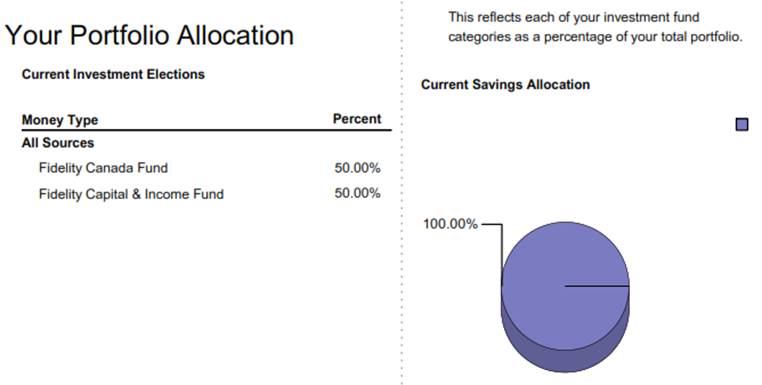
To view a description of each style, select a style and the description will appear in the Description box.
The following are examples of how each available style will appear on the statement.
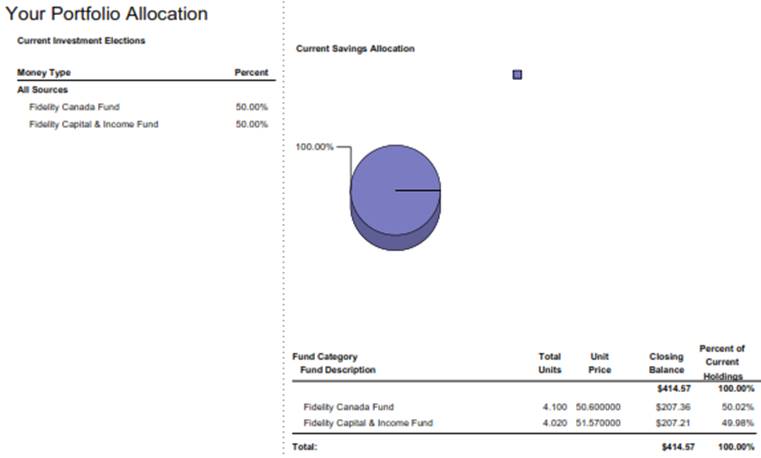
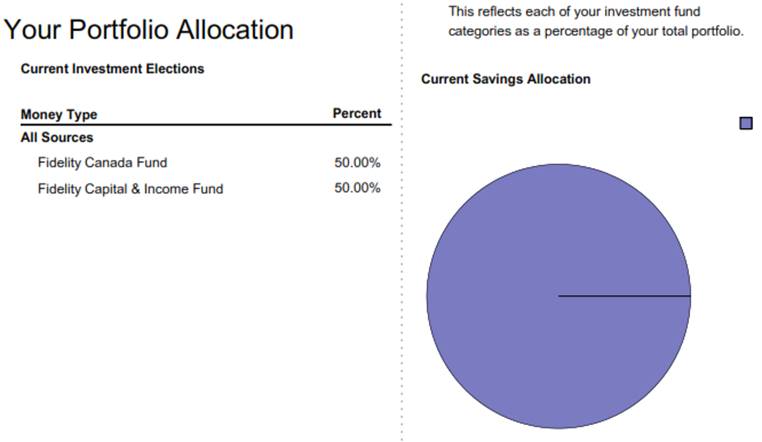
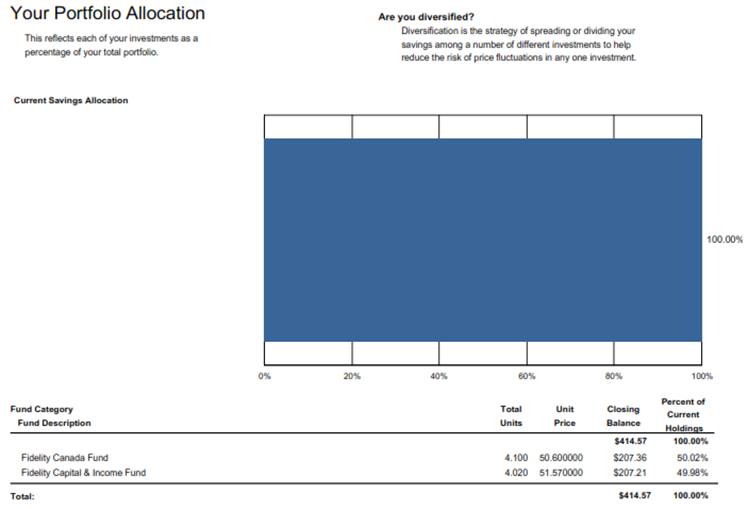
Style: Portfolio Allocation l A - Allocation breakdown with a percentage labeled pie chart and Investment Information
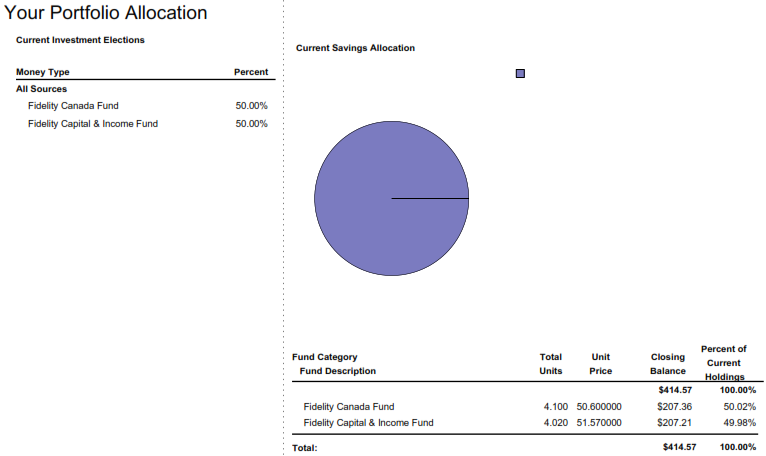
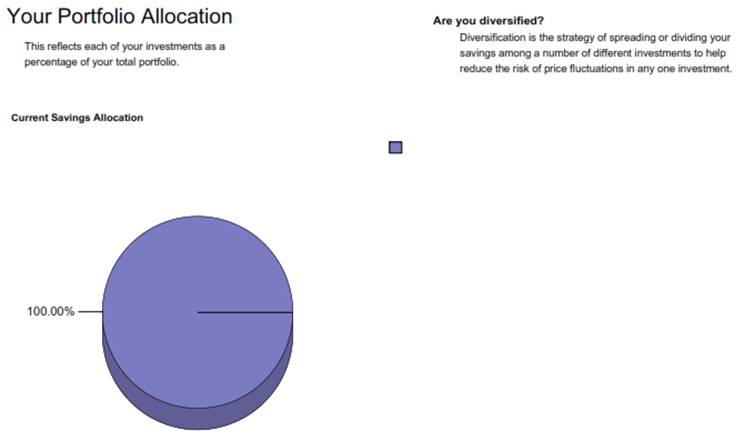
Style: Portfolio Allocation l B - Allocation breakdown with an unlabeled pie chart and Investment Information
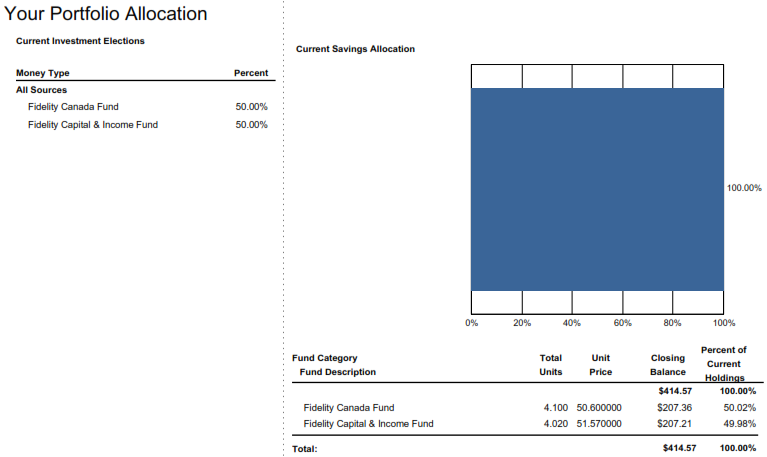
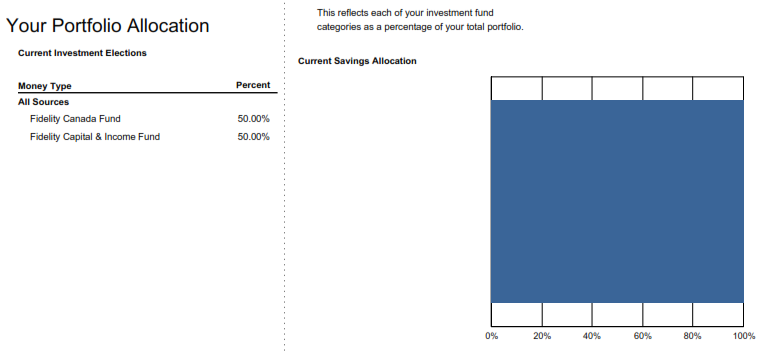
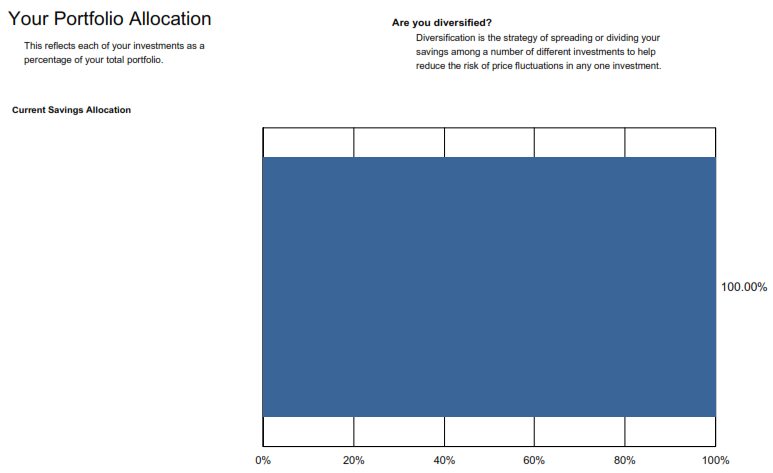
Style: Portfolio Allocation l C - Allocation breakdown with a percentage labeled bar chart and Investment Information
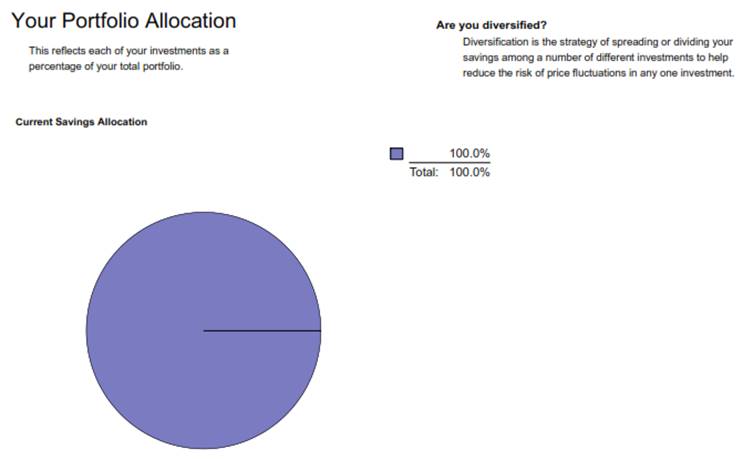
Style: Portfolio Allocation ll A - Allocation breakdown with a percentage labeled pie chart
Style: Portfolio Allocation ll B - Allocation breakdown with an unlabeled pie chart
Style: Portfolio Allocation ll C - Allocation
breakdown with a percentage labeled bar chart
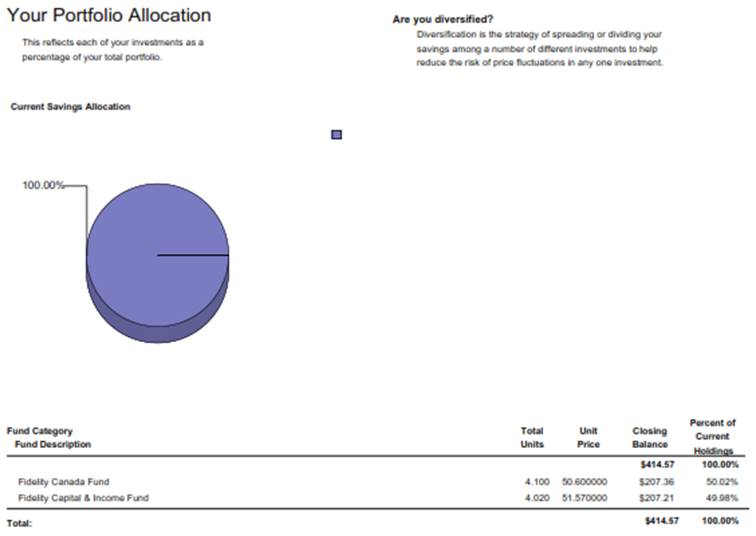
Style: Portfolio Allocation lll A - Percentage
labeled pie chart and Investment Information
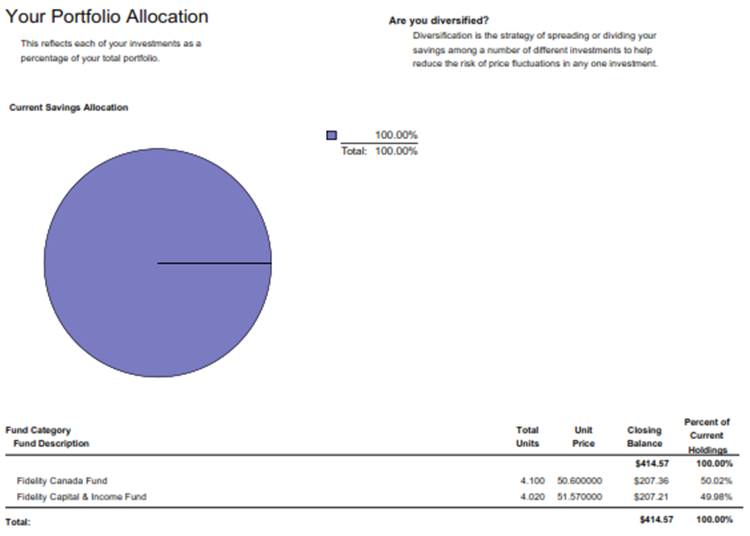
Style: Portfolio Allocation lll B - Unlabeled pie chart and Investment Information
Style: Portfolio Allocation lll C - Percentage labeled bar chart and Investment Information
Style: Portfolio Allocation lV A - Percentage labeled pie chart only
Style: Portfolio Allocation lV B - Unlabeled pie chart only
Style: Portfolio Allocation lV C - Percentage labeled bar chart only
There are also 3 Group By
options from which to choose:
The following are examples of how each Group By option will appear on the statement.
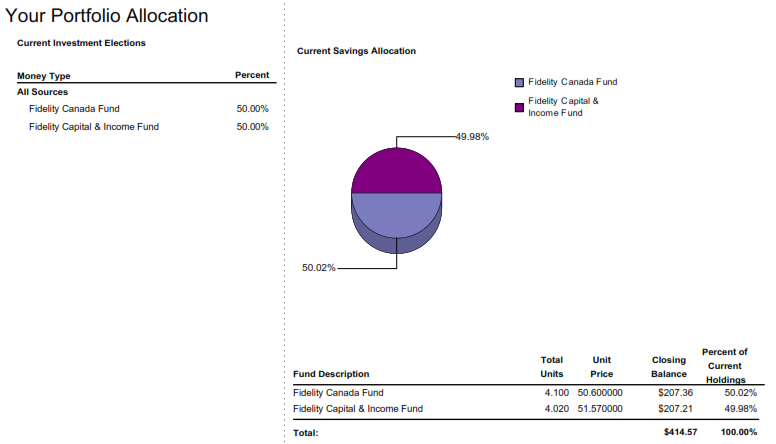
Group By: Fund Category, Description (Style: Portfolio Allocation l A - Allocation breakdown with a percentage labeled pie chart and Investment Information)

Group By: Fund Description (Style: Portfolio Allocation l A - Allocation breakdown with a percentage labeled pie chart and Investment Information)
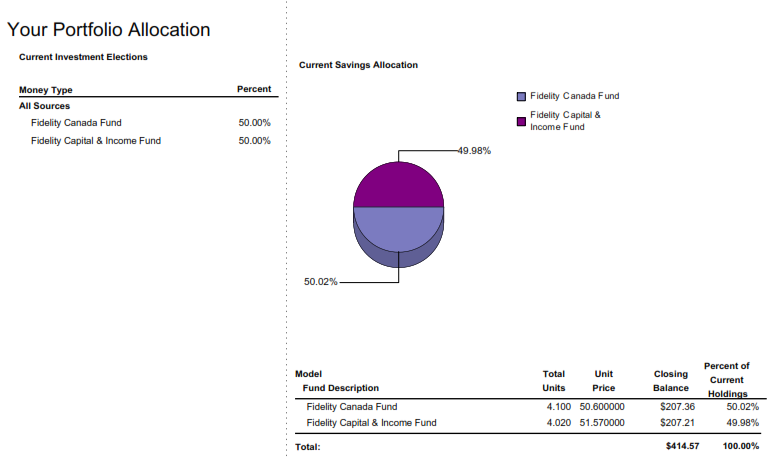
Group By: Model, Fund Description (Style: Portfolio Allocation l A - Allocation breakdown with a percentage labeled pie chart and Investment Information)
You can also select any of the following options:
Select the New page before check box to insert
a blank page before this section.
Select the New page
after check box to insert a blank page after this section.
Select the Print at
bottom of the page check box to print this section on the bottom of
the page of the statement.
A helpful hint:
If you do not choose any of these options, TSM SmartClient will automatically space out the Portfolio Allocation section and
use the selected style.
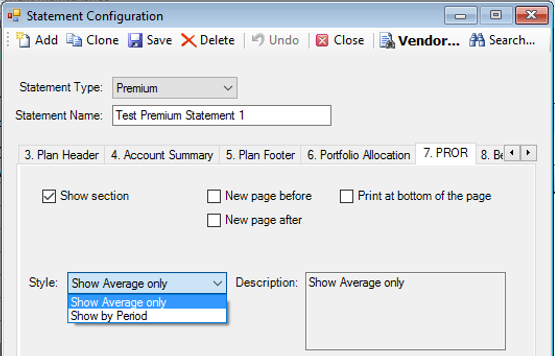
11.Click the 7. PROR tab.
The PROR Tab
Use the PROR tab options to show a simplified total return (as a percentage) for the participant's total portfolio, either for the statement period or for a predefined period. This is an optional section. TSM SmartClient offers two options for this section: Show Average only and Show by Period.
Select the Show section check box to include this section on the statement.
Select Style: Show Average only to show a simplified rate of return for the statement date range entered.
Select Style: Show by Period to show a simplified rate of return for predefined statement periods. The predefined periods are: 1 month, 3 month, 1 year, 3 year, 5 year and From Inception.
You can also select any of the following options:
Select the New page before check box to
insert a blank page before this section.
Select the New page
after check box to insert a blank page after this section.
Select the Print at
bottom of the page check box to print this section on the bottom of
the page of the statement.
A helpful hint: If you do not choose any of these options, TSM SmartClient will automatically space out the PROR section and use the selected style.
The following are examples of each Style option:
This is how the Show Average only Style will appear on the statement:

This is how the Show by Period Style will appear on the statement:

Important Note: If PROR is turned on in Statement Configuration, but Generate Monthly PROR is NOT performed prior to statement creation, the statement will still be generated, however, the “Your Personal Performance” section of the statement will not contain data. The following is an example of what you would see on the statement with this scenario.

Please click the following link for instructions on how to Generate Monthly PROR. How to Generate Monthly PROR.
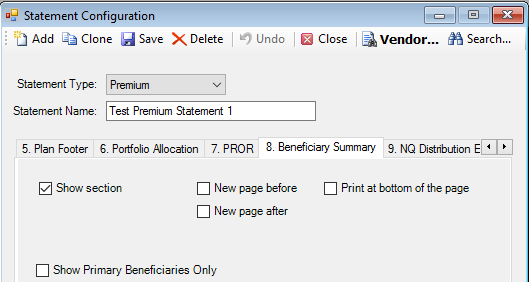
12.Click the 8. Beneficiary Summary tab.
Beneficiary Summary Tab
The Beneficiary Summary section is an optional section that displays a participant’s beneficiaries by investment.
Select the Show section check box to include this section on the statement.
You can also select any of the following options:
Select the New page before check box to
insert a blank page before this section.
Select the New page
after check box to insert a blank page after this section.
Select the Print at
bottom of the page check box to print this section on the bottom of
the page of the statement.
A helpful hint:
If you do not choose any of these options, TSM SmartClient will automatically space out the Beneficiary Summary section.
You can choose to show all beneficiaries or only primary beneficiaries.
To show all beneficiaries, do NOT select the ‘Show Primary Beneficiaries Only’ check box.
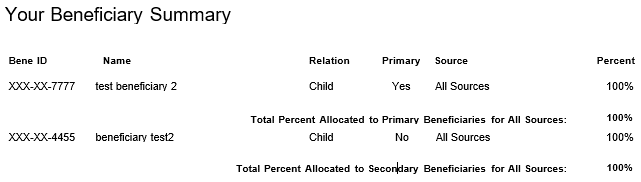
The following is an example of how the Beneficiary Summary section (with Show Primary Beneficiaries Only unchecked) will appear on a statement:
To show only primary beneficiaries, select the ‘Show Primary Beneficiaries Only’ check box.
The following is an example of how the Beneficiary Summary section (with Show Primary Beneficiaries Only checked) will appear on a statement:

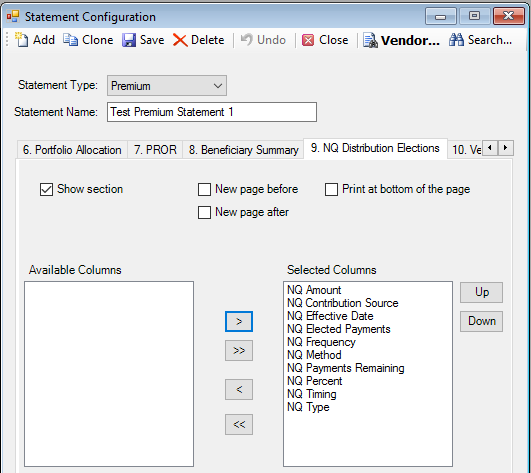
13.Click the 9. NQ Distribution Elections tab.
NQ Distribution Elections Tab
The NQ Distribution Elections section is an optional section that displays a participant’s Non-Qualified Distribution Elections.
Select the Show section check box to include this section on the statement.
You can also select any of the following options:
Select the New page before check box to
insert a blank page before this section.
Select the New page
after check box to insert a blank page after this section.
Select the Print at
bottom of the page check box to print this section on the bottom of
the page of the statement.
A helpful hint:
If you do not choose any of these options, TSM SmartClient will automatically space out the NQ Distribution Elections section
and use the selected columns.
You can specify the information
you want to include in the NQ Distribution Elections section by selecting the
options in the Available Columns box. Highlight the desired row and click the ![]() button to move the
selection to the Selected Rows box. The fields appear on the statement in the
same order as in the Selected Rows box. To change the order, click the
button to move the
selection to the Selected Rows box. The fields appear on the statement in the
same order as in the Selected Rows box. To change the order, click the ![]() and
and ![]() buttons.
buttons.
The following is an example of how the NQ Distribution Elections section will appear on the statement.

Important Note: For the NQ Distribution Elections section to appear on the statement, there must be at least one Non-Qualified Distribution transaction for the participant that occurred within the date range specified for the statement. Non-Qualified Distribution transactions can be viewed by going to Transactions > Distributions > Non Qualified Distributions. If there are no Non-Qualified Distributions for the given statement date range, this section will NOT appear on the statement.
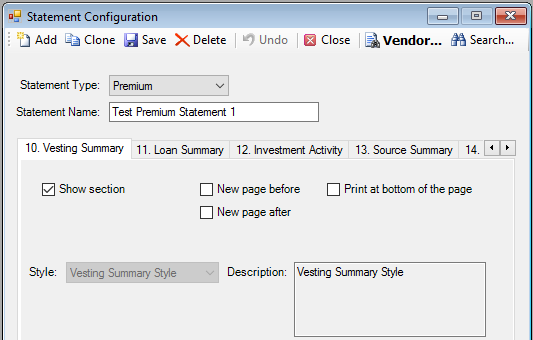
14.Click the 10. Vesting Summary tab.
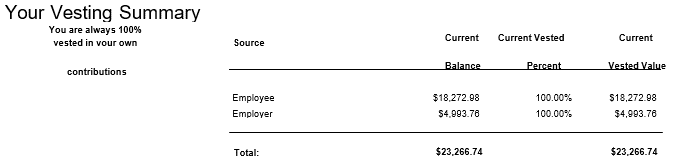
Vesting Summary Tab
Here you can format the participant's vested account balance, both as a percentage and as the vested value as of the statement date range entered.
Select the Show section check box to
include this section on the statement.
The Style is currently fixed and set
to ‘Vesting Summary Style’.
You can also select any of the following options:
Select the New page before check box to
insert a blank page before this section.
Select the New page
after check box to insert a blank page after this section.
Select the Print at
bottom of the page check box to print this section on the bottom of
the page of the statement.
A helpful hint: If you do not choose any of these options, TSM SmartClient will automatically space out the Vesting Summary section and use the selected style.
The following is an example of how the Vesting Summary section
will appear on a statement:
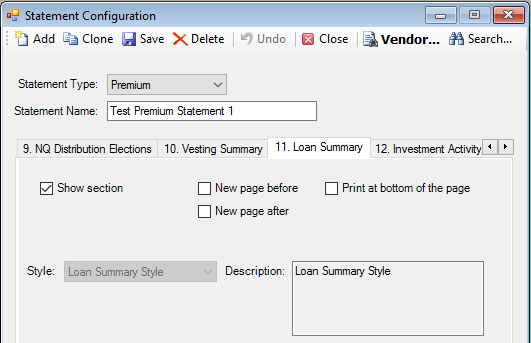
13.Click the 11. Loan Summary tab.
The Loan Summary Tab
Use the Loan Summary section to show the status of all loans for the participant as of the statement date range. This is an optional feature.
Select the Show section check box to include this section on the statement.
The Style is currently fixed and set to ‘Loan Summary Style’.
You can also select any of the following options:
Select the New page before check box to
insert a blank page before this section.
Select the New page
after check box to insert a blank page after this section.
Select the Print at
bottom of the page check box to print this section on the bottom of
the page of the statement.
A helpful hint: If you do not choose any of these options, TSM SmartClient will automatically space out the Loan Summary section and use the selected style.
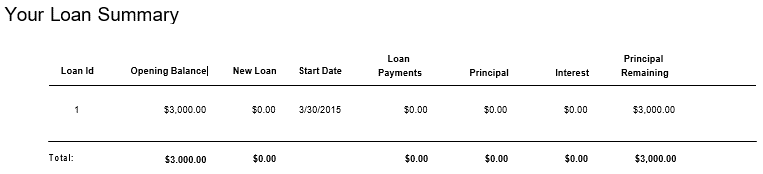
The following is an example of how the Loan Summary section will appear on a statement:
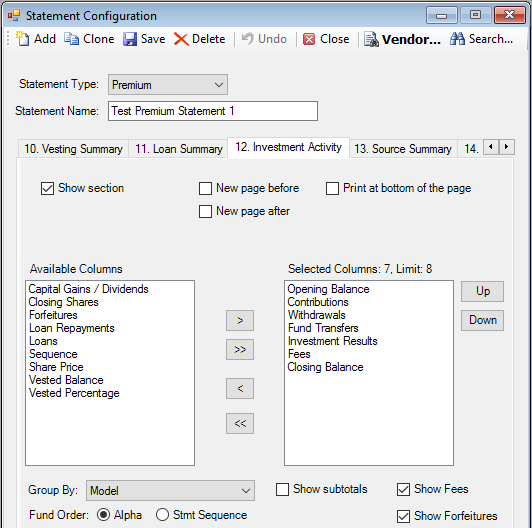
14.Click the 12. Investment Activity tab.
The Investment Activity Tab
The Investment Activity section summarizes activity by transaction type and investment election on a participant level for the statement period.
Select the Show section check box to
include this section on the statement.
Choose the transaction types that you want to appear in the Investment Activity
Summary section from the Available Columns list. Highlight the desired fields
and use the ![]() button to move them to the
Selected Columns list. The fields will appear as column headings on the
statement in the order in which they display in the Selected Rows.
button to move them to the
Selected Columns list. The fields will appear as column headings on the
statement in the order in which they display in the Selected Rows.
Please note that you can select a maximum of (8) columns for this section. Once you have reached 8, you will not be able to proceed.
As in the other options, you can
change the order of the columns by simply highlighting the field and moving it
accordingly via the ![]() and
and ![]() buttons. For example,
suppose you want Loans to appear after Withdrawals in the column lineup. Simply
highlight the Loans field and use the
buttons. For example,
suppose you want Loans to appear after Withdrawals in the column lineup. Simply
highlight the Loans field and use the ![]() button to move accordingly.
After saving your changes, the Loans will now appear after Withdrawals on the
statement.
button to move accordingly.
After saving your changes, the Loans will now appear after Withdrawals on the
statement.
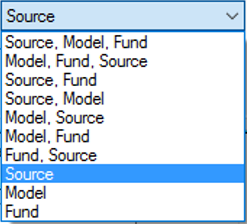
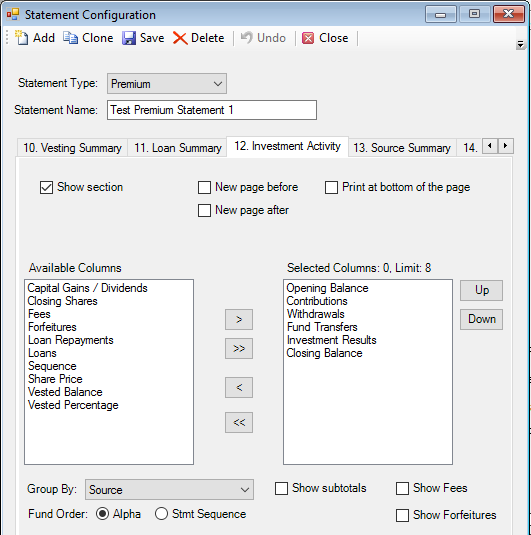
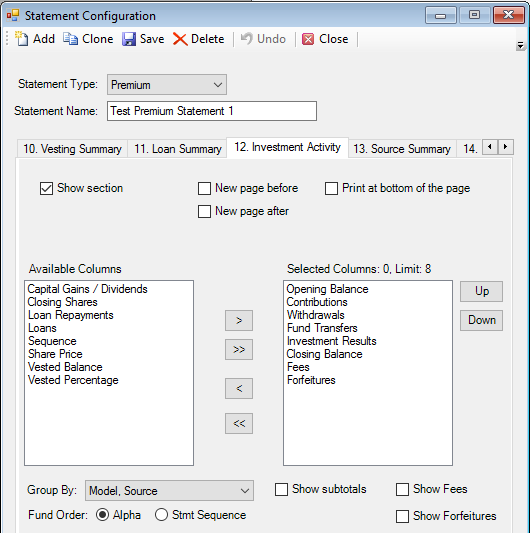
Select one of the following Group By options to choose a style in which financial data will appear in this section:
Select a Fund Order (Alpha or Stmt Sequence).
Select the Show subtotals check box to have TSM SmartClient sub-total transaction type columns based on the Group By sort criteria selected.
See the Show Fees and Show Forfeitures section of this document for further information on the Show Fees and Show Forfeitures check boxes.
You can also select any of the following options:
Select the New page before check box to
insert a blank page before this section.
Select the New page
after check box to insert a blank page after this section.
Select the Print at
bottom of the page check box to print this section on the bottom of
the page of the statement.
A helpful hint: If you do not choose any of these options, TSM SmartClient will automatically space out the Source Summary section and use the selected format.
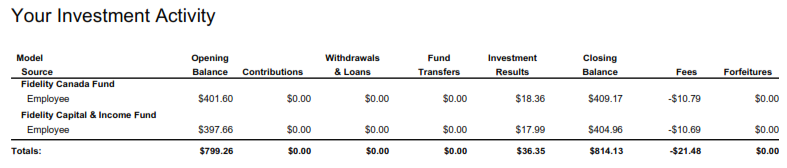
Example 1:
The following is an example of how the Investment Activity section will appear
on a statement (when the above options are selected in TSM SmartClient):

Example 2:
The following is an example of how the Investment Activity section will appear on a statement (when the above options are selected in TSM SmartClient):

Example 3:
The following is an example of how the Investment Activity section will appear on a statement (when the above options are selected in TSM SmartClient)
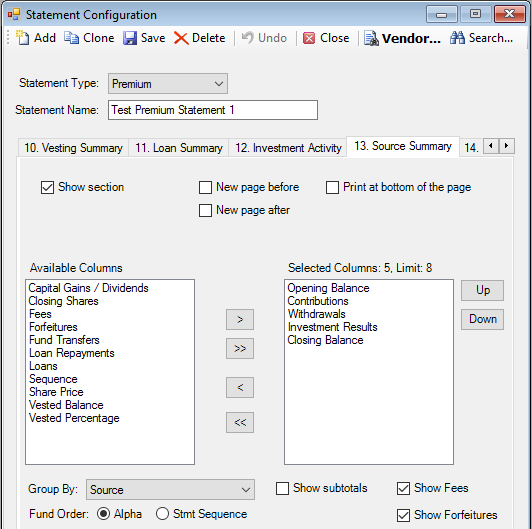
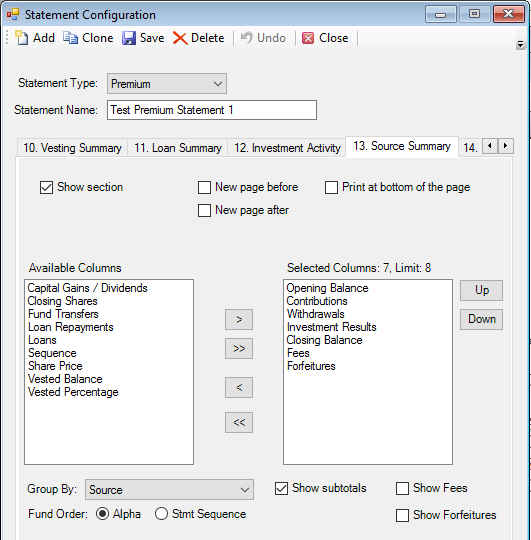
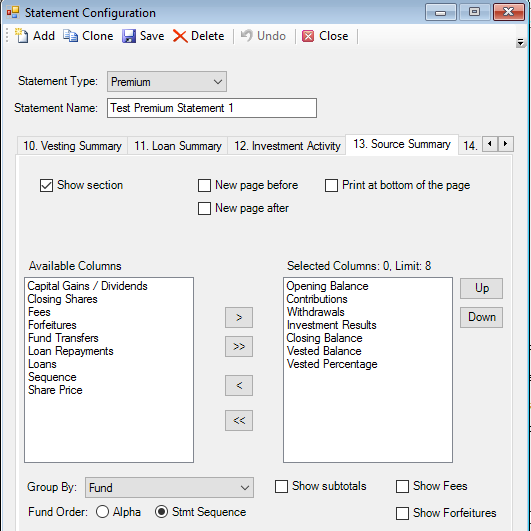
15.Click the 13. Source Summary tab.
The Source Summary Tab
Use the options on the Source Summary tab to display summary activity by transaction type and source/money type on a participant level for the selected statement period. This is an optional section.
Select the Show section check box to include this section on the statement.
Choose the transaction types that
you want to appear in the Source Summary section from the Available Columns
list. Highlight the desired fields and use the ![]() button to move them to the Selected Columns
list. The fields will appear as column headings on the statement in the order
in which they display in the Selected Rows.
button to move them to the Selected Columns
list. The fields will appear as column headings on the statement in the order
in which they display in the Selected Rows.
Please note that you can select a maximum of (8) columns for this section. Once you have reached 8, you will not be able to proceed.
You can change the order of the
columns by simply highlighting the field and moving it accordingly via the ![]() and
and ![]() buttons.
buttons.
Select one of the following Group By options to choose a style in which financial data will appear in this section:
Select a Fund Order (Alpha or Stmt Sequence).
Select the Show subtotals check box to have TSM SmartClient sub-total transaction type columns based on the Group By sort criteria selected.
See the Show Fees and Show Forfeitures section of this document for further information on the Show Fees and Show Forfeitures check boxes.
You can also select any of the following options:
Select the New page before check box to insert
a blank page before this section.
Select the New page
after check box to insert a blank page after this section.
Select the Print at
bottom of the page check box to print this section on the bottom of
the page of the statement.
A helpful hint: If you do not choose any of these options, TSM SmartClient will automatically space out the Source Summary section and use the selected format.
Example 1:
The following is an example of how the Source Summary section will appear on a statement (when the above options are selected in TSM SmartClient).

Example 2:
The following is an example of how the Source Summary section will appear on a statement (when the above information is selected in TSM SmartClient).

Example 3:
The following is an example of how the Source Summary section will appear on a statement (when the above information is selected in TSM SmartClient).

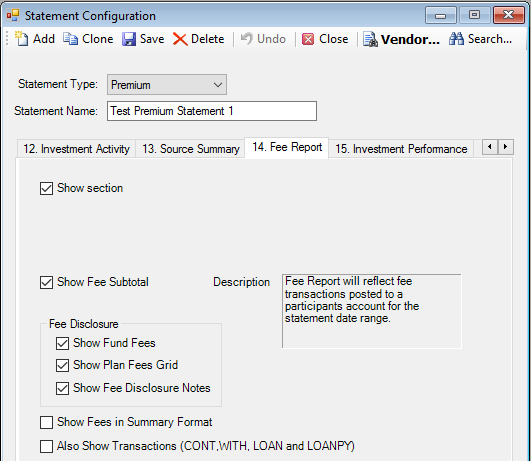
16.Click the 14. Fee Report tab.
The Fee Report Tab
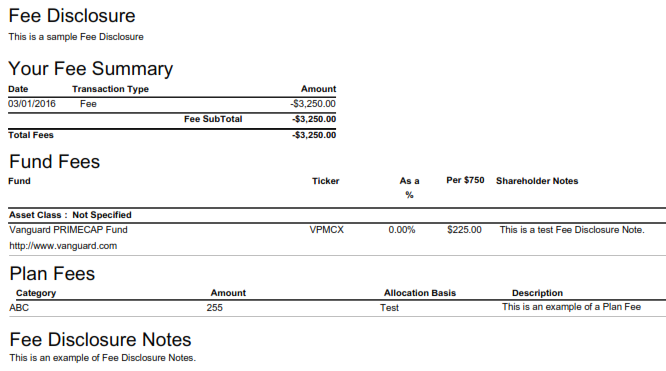
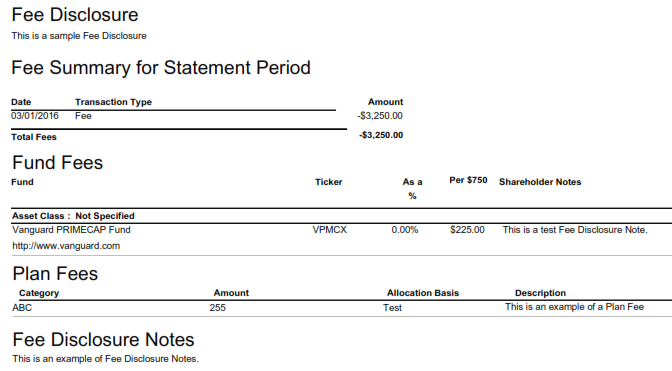
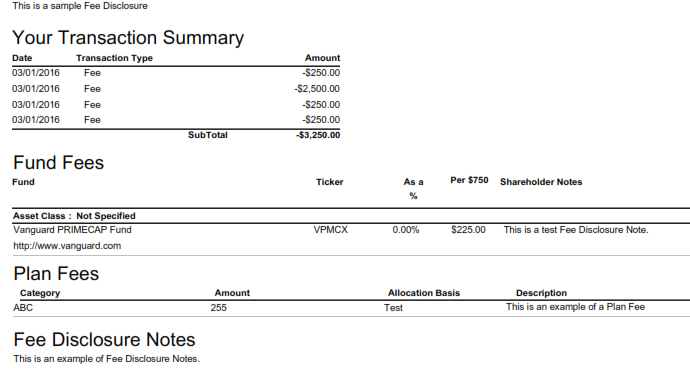
Use the options on the Fee Report tab to display Fees for the selected statement period that will appear on the last page of the statement. The Fee Report section includes a Fee Summary, Fund Fees, Plan Fees and Fee Disclosure Notes. This is an optional section.
Select the Show section check box to include this section on the statement.
You can also select any of the following options:
Select the Show Fund Fees check box to display Fund fees.
Select the Show Plan Fees Grid check box to display Plan fees.
Select the Show Fee Disclosure Notes check box to display the fee disclosure notes. (Important Note: For this section to appear on the statement, a Notes ID must also be selected on the Setup > Plans > Plan > Statements tab.)
Select Show Fee Subtotal check box to display a subtotal of the Fees.
Select Show Fees in Summary Format check box to display fees in a summary format.
Select Also Show Transactions check box to display fees by transaction.
Important Note: The Show Fee Subtotal, Show Fees in Summary Format, and Also Show Transactions check boxes are mutually exclusive (i.e. you can only select one of these check boxes).
The following is an example of how the Fees Report section will appear on a statement (with the Show Fee Subtotal box checked).
The following is an example of how the Fees Report section will appear on a statement (with the Show Fees in Summary Format box checked).
The following is an example of how the Fees Report section will appear on a statement (with the Also Show Transactions box checked).
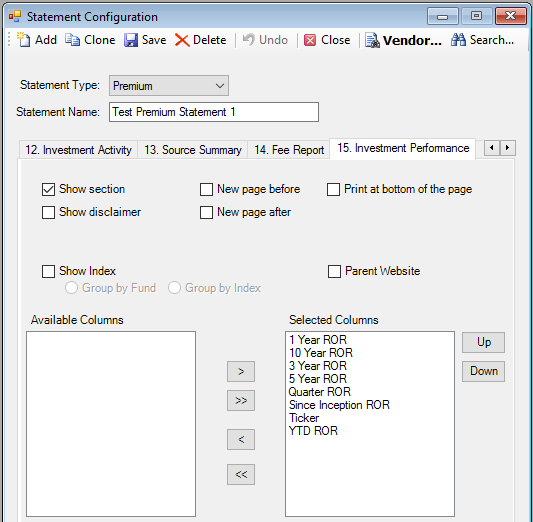
17.Click the 15. Investment Performance tab.
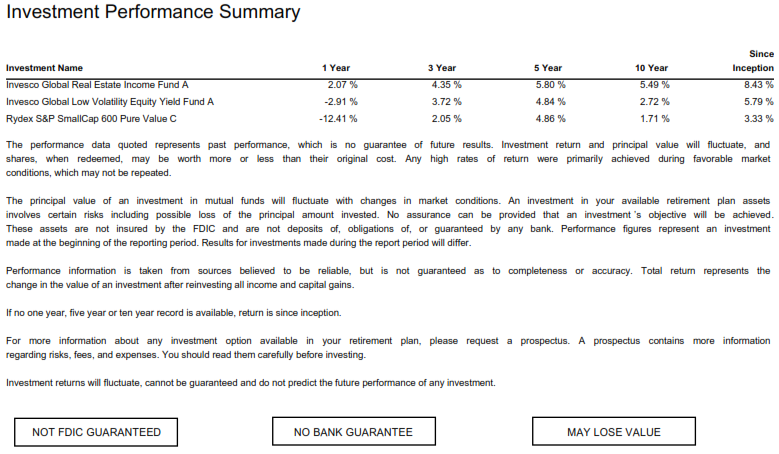
The Investment Performance Tab
Use the options on the Investment Performance Summary tab to display historical performance data by fund for selected periods. This is an optional section.
Note: Access the Setup > Funds > Performance Entry option to confirm that the historical information has been updated for the selected date range.
Select the Show section check box to include this section on the statement.
Select the Show disclaimer checkbox to display a disclaimer that is hard-coded in our system. The disclaimer will appear at the end of the Investment Performance page.
Select the Show
Index check box to …….
Select the Parent Website check box
to …….
You can also select any of the following options:
Select the New page before check box to
insert a blank page before this section.
Select the New page
after check box to insert a blank page after this section.
Select the Print at
bottom of the page check box to print this section on the bottom of
the page of the statement.
A helpful hint:
If you do not choose any of these options, TSM SmartClient will automatically space out the Investment Performance section
and use the selected format.
The following is an example of how the Investment Performance section will appear on the statement.

If the ![]() check box is enabled, the
disclaimer text will appear at the end of the Investment Performance section,
like in the following example:
check box is enabled, the
disclaimer text will appear at the end of the Investment Performance section,
like in the following example:
If the ![]() is selected, the index data
will appear in blue as in the following example:
is selected, the index data
will appear in blue as in the following example:

If the ![]() is selected, the index data
will appear in blue as in the following example:
is selected, the index data
will appear in blue as in the following example:

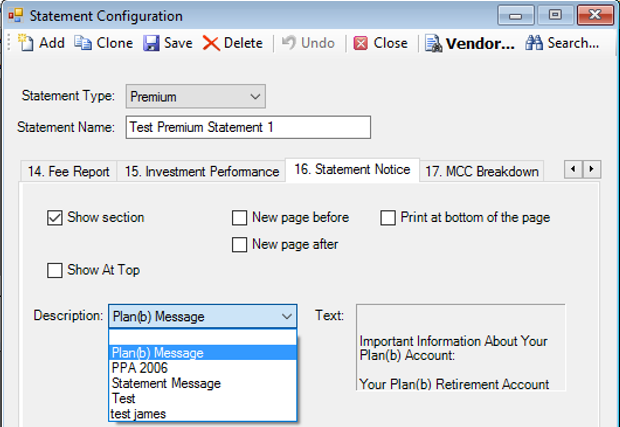
18.Click the 16. Statement Notice tab.
The Statement Notice Tab
The Statement Notice section is an optional section that displays predefined text on the statement. You can choose to have the text appear at the top or bottom of page 2.
Select the Show section check box to include this section on the statement.
Select a Description from the drop down list. The text corresponding with the chosen description will appear in the Text box. This text will appear at the top or bottom of page 2, depending on whether ‘Show At Top’ or ‘Print at bottom of the page’ are selected. Important Note: Statement descriptions and text are created/updated via Statements > Setup > Statement Text. For further instructions on how to add/update/delete Statement Notices, please click the following link. How to Add/Update/Delete a Statement Notice.
You can also select any of the following options:
Select the New page before check box to
insert a blank page before this section.
Select the New page
after check box to insert a blank page after this section.
Select the Print at
bottom of the page check box to print this section on the bottom of
the second page of the statement.
Select the Show At
Top check box to print this section at the top of the second page of the
statement.
Note: If both Print at bottom of the page and Show At Top options are selected, the Statement Notice will only appear at the bottom of page 2. If neither option is selected, the Statement Notice will appear on the last page of the statement.
A helpful hint: If you do not choose any of these options, TSM SmartClient will automatically space out the Statement Notice section and use the selected format.
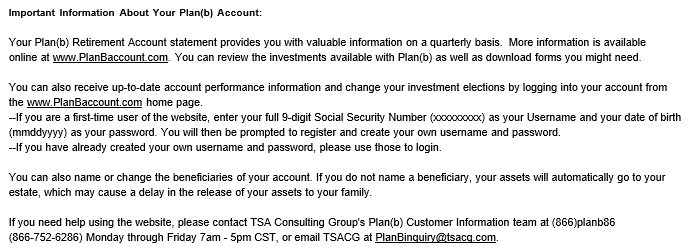
The following is an example of how the above Statement Notice will appear on the statement. Since neither ‘Show At Top’ or ‘Print at bottom of the page’ are selected, the Statement Notice appears on the last page of the statement:
17.When you are done, click the Save icon ![]() to save
your statement.
to save
your statement.
18.Now that you have configured your Premium statement, you can assign the plans that will be using this statement.