__________________________________________________________________________________________________
Participant Extract
Use the Participant Extract option to export participant level data for the current plan for a date range. TSM.Net creates a file with participant level information (demographic information, as well as holdings information, to name a few.). On the Participant Extract window you will see four tabs: Inclusion Criteria for filtering information, Output Options for file type and location, Data Layout for specifying which fields to include, and Plans for specifying which plans to include.
How to Access the Participant Level Data Extract Window
On the Interfaces menu, point to Exports, and then click Participant Extract. The Participant Level Data Extract window displays.
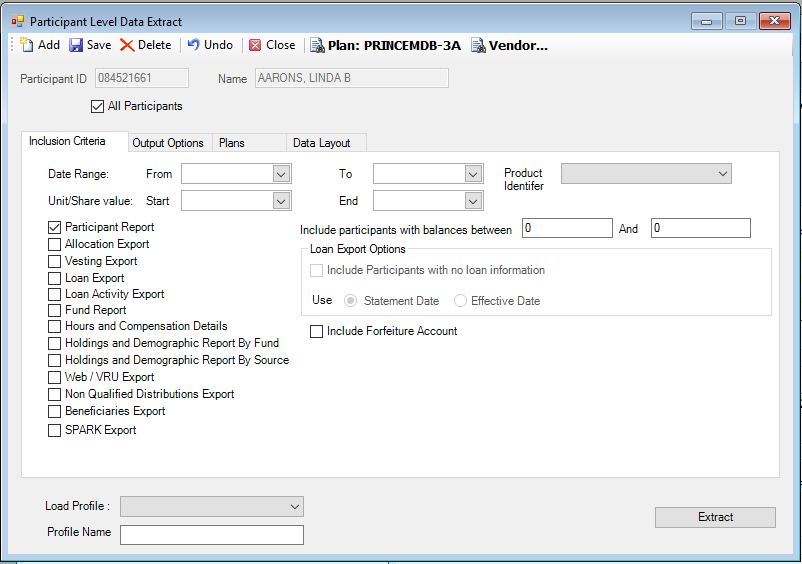
Participant Extract - Inclusion Criteria Tab
![]()
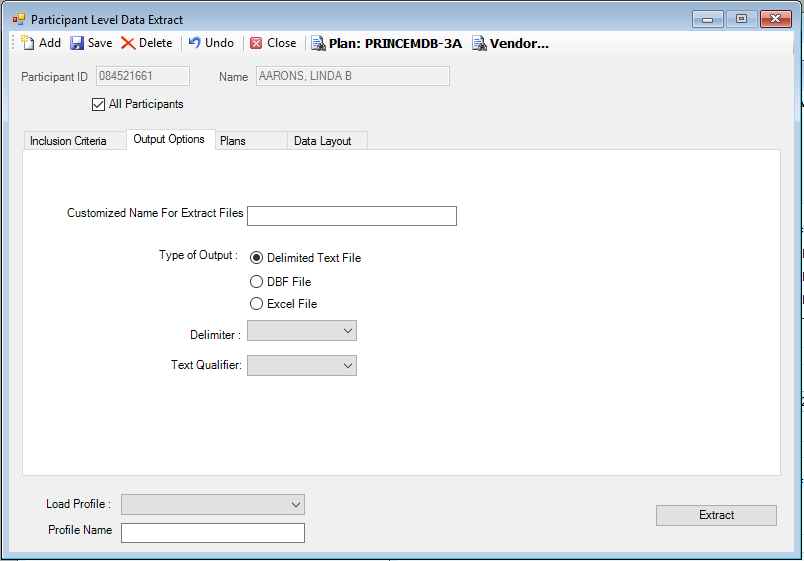
Participant Extract - Output Options Tab
![]()
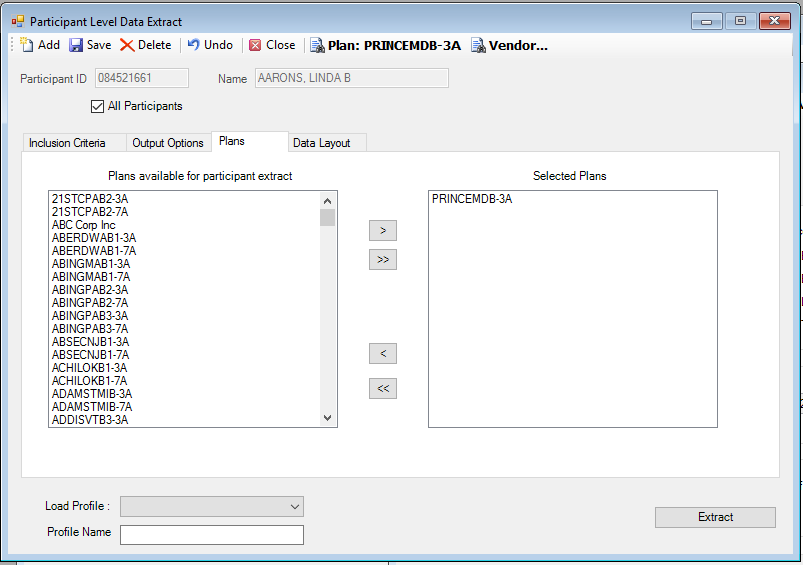
Participant Extract - Plans Tab
![]()
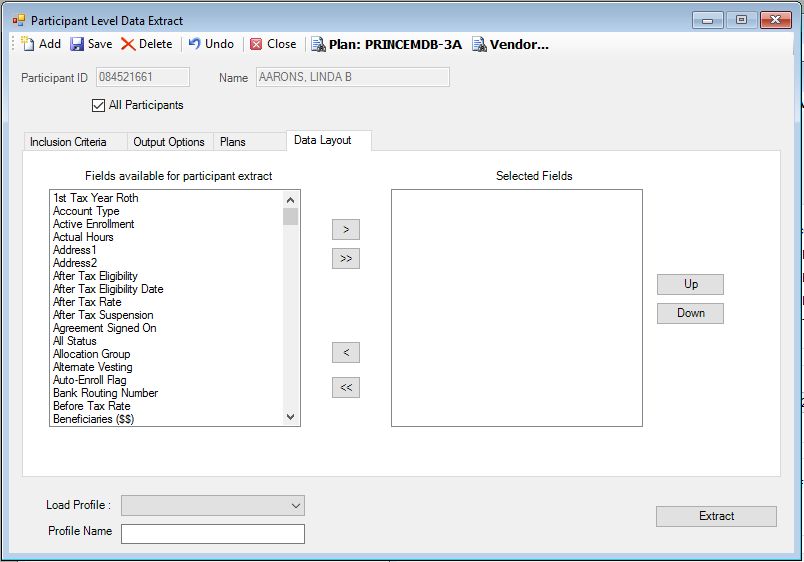
Participant Extract – Data Layout Tab
![]()
How to Create a Participant Extract
1. On the Inclusion Criteria tab, enter the Date Ranges for the Statement Period and Unit/Share Value.
2. Select the Product Identifier from the list, if desired.
3. You must select the Participant Report check box. This will produce the participant extract.
4. Select the Include Forfeiture Account check box to include the forfeiture account in the extract, if desired.
5. Click the Output Option tab.
6. On the Output Option tab, enter the Customized Name for Extract Files. This is a required field.
7. The Type of Output is a Delimited Text File. Select the characters to use as the delimiter and the text qualifier from the applicable lists. (Note: If Excel is the desired output type, select the Tab delimiter and use the 'open with' MS Excel option.)
8. Click the Data Layout tab.
9. On the Data Layout tab, select the fields you want to include in the participant extract and move them to the Selected Fields list. You can change the order in which the fields appear on the report by moving them Up and Down.
10.Click the Plans tab.
11.On the Plans tab, select the Plans you want to include in the participant extract and move them to the Selected Plans list.
12.When you are done, click Extract to process the extract. The file will now appear in the Job Queue.
How to Access the File
1. Access the Job Queue.
2. Click the file in the Report column. The Save As dialog box displays.
3. Specify where you want to save the file and click Save.
4. Navigate to the file location.
5. Right-click the file. Select Open, and then choose the program you want to use to open the file. For example, if you are using Excel, choose Microsoft Office Excel on the list. Click OK. The specified program opens.
How to Save a Profile to Use Again
1. Create the profile, including dates, customized data for the target plan(s).
2. Enter the Profile Name on the Data Layout tab.
3. Click the Save icon. The following message displays:
The Profile Name will appear in the Load Profile list. You can now access it.
Explanation of Fields
|
Field Name |
Field Description |
Required / Optional |
|
Inclusion Criteria Tab |
||
|
Statement Period: From |
Enter the start date for the extract. |
Required |
|
Statement Period: To |
Enter the end date for the extract. |
Required |
|
Unit/Share Value: Start |
Enter the start date for the unit/share value range. |
Required |
|
Unit/Share Value: End |
Enter the end date for the unit/share value range. |
Required |
|
Participant Report |
Select this check box to produce the participant extract. |
Required |
|
Include Forfeiture Account |
Select this check box to include the forfeiture account details, if applicable. |
Optional |
|
Product Identifier |
Select the product identifier, if applicable. This mirrors what is entered in the Product Code field of the Plan Setup screen. |
Optional |
|
Output Options Tab |
||
|
Customized Name for Extract Files |
Enter the name for the extract file. |
Required |
|
Type of output |
TSM SmartClient creates a Delimited Text File, DBF File or Excel File. |
Required |
|
Delimiter |
Select the character to use to separate the fields. |
Required |
|
Text Qualifier |
Select the character to use as the text qualifier. |
Required |
|
Data Layout Tab |
||
|
Fields available for participant extract |
Choose the fields to include in the participant extract. Click the fields to highlight them on the Available side and click the appropriate Move button to move it to the Selected side. Fields will output in the order they are chosen. You can use the Up and Down buttons to change the order. |
Required |
|
Fields selected so far |
Displays all selected fields from the Fields available for participant extract column. |
Display only. |
|
Plans Tab |
||
|
Plans available for extract |
Click the fields to highlight them on the Available side and click the appropriate Move button to move it to the Selected side. |
Required |
|
Load Profile |
From the list, select the participant extract profile |
Optional |
|
Profile Name |
Enter the name of the profile after you have created the extract. Note: If you add fields from the Data Layout tab and click the "Save Profile" button, TSM SmartClient will overwrite your original profile. Rename the new profile before saving it. |
Optional |