Security Profile
Setting up security rights for users is useful for limiting access to certain options and/or plans in TSM. The Security Profile option allows you to define the different levels of security access on the system. Management or the security administrator would normally complete this process. is shipped to your site with one security profile established: SysAdm. You may want to create different security profiles on such as CSR (Client Service Representative), who will have viewing, adding and deleting capabilities, and Data Entry (Data Entry Clerk), who will have viewing and adding capabilities. supports an unlimited number of security profiles.
Note: Once you have defined a profile, it cannot be deleted from .
You can assign View, Add, Edit, Delete, and System Administrator rights to every window in TSM.
Select:
· View rights to allow the user to view the information on the window
· Add rights to allow the user to add information to the window
· Edit rights to allow the user to edit existing information on the window
· Delete rights to allow the user to delete information currently on the window
· System Administrator rights to allow the user to perform all tasks and functions on the system. This is the highest security level on and is usually given to system administrators only.
Note: Data Entry clerks would normally not have access to the following options (these are listed as examples, however, you may feel there are other options you would want to restrict):
· Setup > System > Security Profile
· Setup > System > User Security
· Setup > Plans > Plan
Note: You must exit and log back in for your changes to take effect.
See Also: How to Set up Security Rights for a User
How to access this option
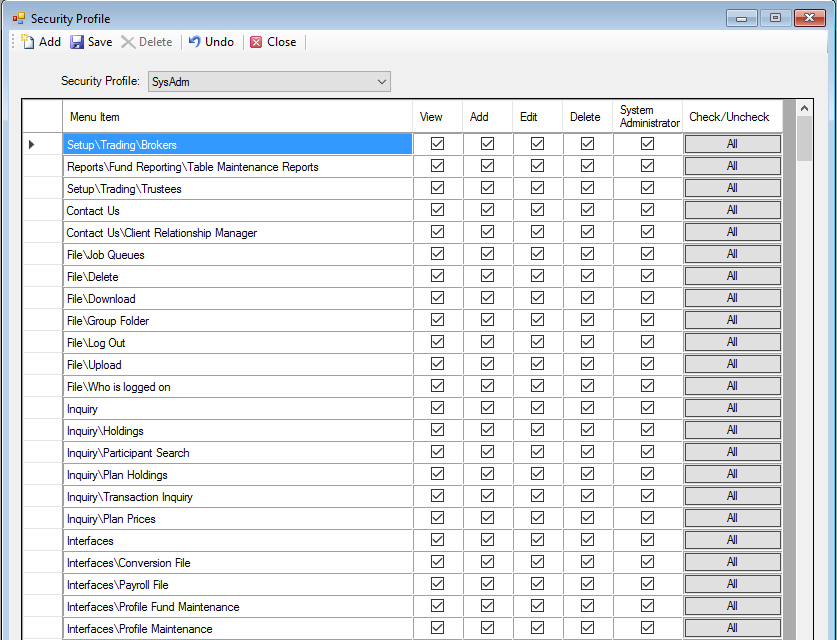
On the Setup menu, point to System, and then click Security Profile. The Security Profile window displays.

How to Create a Profile
- Click the
 icon. The New
Profile Name dialog box displays.
icon. The New
Profile Name dialog box displays.
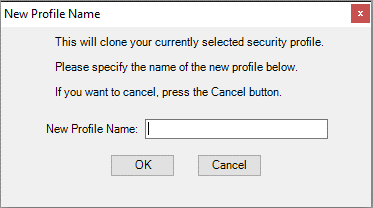
- Enter a New Profile Name in the field and click OK. This will copy the currently displayed security profile.
- Choose the level of rights you want to assign to each window for this profile by selecting the check box(es) that corresponds to the security level, or click All to select all levels. You can select more than one security level. For example, you could limit the 'Clerk' profile to 'View' and to 'Edit' only. The All button is a toggle-like switch to select or clear all the check boxes for the record.
Note: The default System Administrator security level can View, Add, Edit, and Delete all options.
- When you
are done, click the
 icon to save the selected information.
Explanation of Fields:
|
Field Name |
Field Description |
Required / Optional |
|
Security Profile |
Choose the security profile from the list. TSM SmartClient is delivered with only
the System Administrator profile. |
Required |
|
Menu Item |
These are the menu paths for each option in TSM SmartClient. Select the menu option by clicking it. The windows are displayed in ascending (a-z) alphabetical order. To change the order to descending (z-a) click in the heading. The up-arrow will appear to show the current ascending order or the down arrow will show the descending order. |
Optional |
|
View |
Select this check box to assign viewing privileges to this user for the highlighted option. This is the lowest security level on the system. All windows will be displayed for inquiry purposes only. |
Optional |
|
Add |
Select this check box to give the user the ability to add records for the highlighted option. This level of security is given to almost all users. |
Optional |
|
Edit |
Select this check box to give the user the ability to edit plan data or participant data for the highlighted option. This level of security is given to all users who need to edit plan or participant data. |
Optional |
|
Delete |
Select this check box to give the user the ability to delete records for the highlighted option. This level of security is usually given to high level users. |
Optional |
|
System Administrator |
Select this check box to give the user the ability to perform all tasks and functions on the system. This is the highest security level on the system. |
Optional |
|
Check/Uncheck |
The All button works as a toggle to either select or clear all the check boxes (View, Add, Edit, Delete and System Administrator) for this option. |
Optional |