How to Turn on On-Demand Statements on PWEB
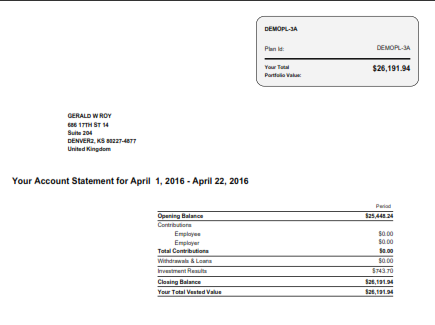
The functionality of statements built into smart client allows the record-keeper to generate and publish statements for a specified date range, with details as configured in the smart client.
Prerequisite:
For processing the statements, the following functions in the smart client have to be enabled:
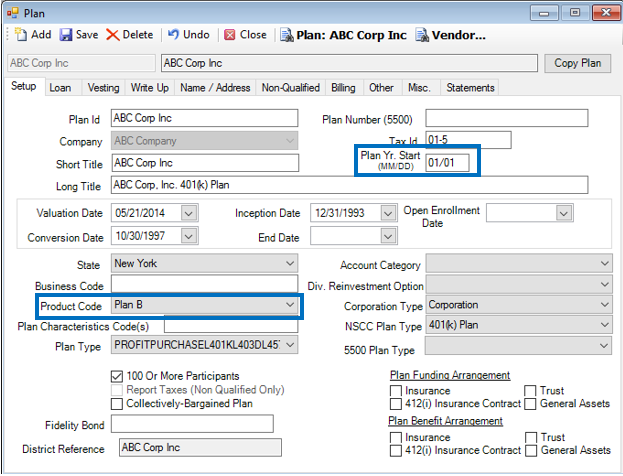
1. Go to Setup > Plans > Plan > Setup Tab.
· The Product Code selected should be ‘Plan B‘.
· The Plan Yr. Start (MM/DD) should be ‘01/01’.
· Click <Save> to save changes.
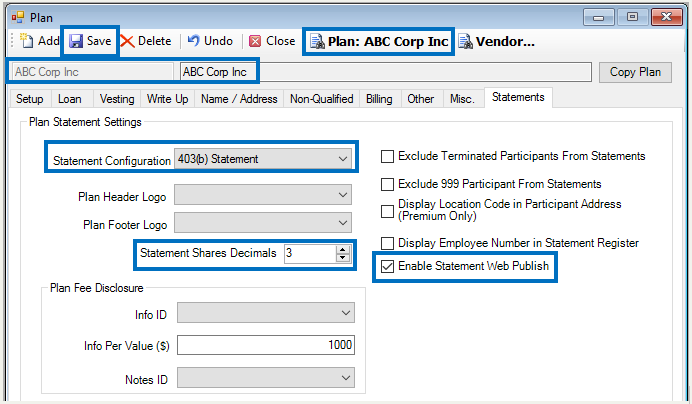
2. Go to Setup > Plans > Plan > Statements Tab.
·
Select the correct Plan by clicking on the Plan icon ![]() . (e.g. ‘ABC Corp Inc’)
. (e.g. ‘ABC Corp Inc’)
· Select ‘3’ for the Statement Shares Decimals field.
· Enable the check box for ‘Enable Statement Web Publish’. This allows the statements to be published on web.
· Select the correct Statement Configuration (e.g. ‘403(b) Statement’, ‘403(b) Statement IPX 1’). (Note: For instructions on how to assign a Statement Configuration to a Plan, please click the following link. how_to_assign_statement_to_plan.htm)
· Click <Save> to save changes.
(Note:
Please click the following link for instructions on uploading and configuring
the Plan logo for the statements.)
how_to_upload_a_plan_logo_to_use_on_statements.htm
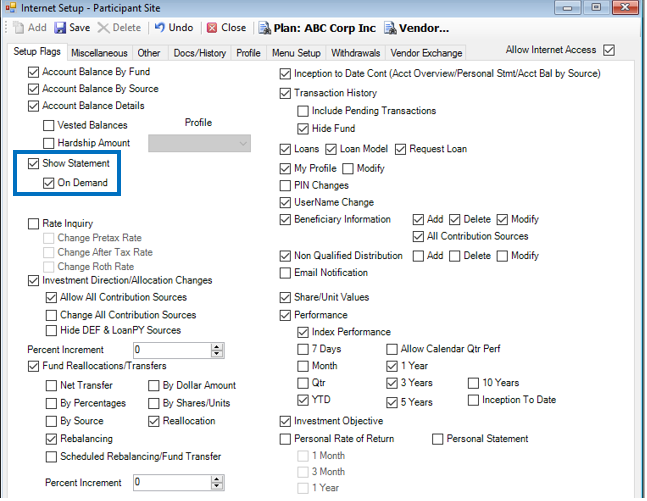
3. Go to Setup > Plans > Internet Setup > Participant Site.
· Enable the checkbox for ‘Show Statement’.
· Enable the checkbox for ‘On Demand’.
· Click <Save> to save changes.
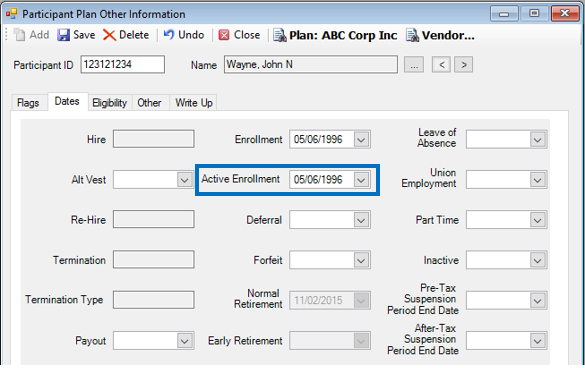
4. Go to Setup > Participants > Participant Plan Other Information > Dates Tab.
· Select the correct participant.
· Ensure the ‘Active Enrollment’ date appears for the participant.
· Click <Save> to save changes.
5. Generate Monthly PROR – This step is only performed if the Statement Type is ‘Premium’, and the ‘Show section’ check box is enabled on the 7. PROR tab under Statements > Setup > TPA Statement Configuration.

Please click the following link for instructions on how to Generate Monthly
PROR. How to Generate Monthly PROR
Note: If PROR is turned on in Statement Configuration, but Generate Monthly PROR is NOT performed prior to statement creation, the statement will still be generated, however, the “Your Personal Performance” section of the statement will not contain data.

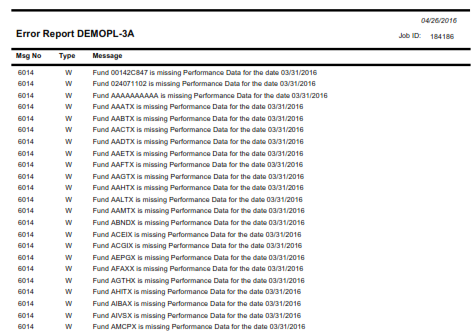
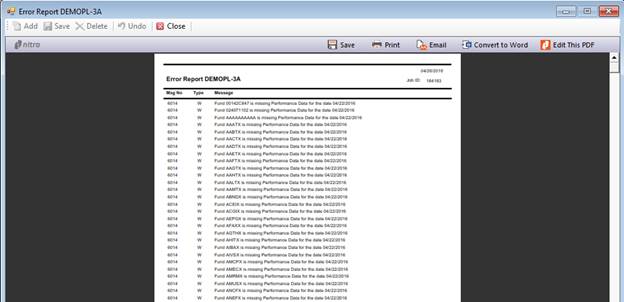
6. Upload Morningstar Data – This step is only needed if the ‘Show section’ check box is enabled on the 15. Investment Performance tab under Statements > Setup > TPA Statement Configuration.
Please click the following link for additional information on Uploading Morningstar data. Place link here.
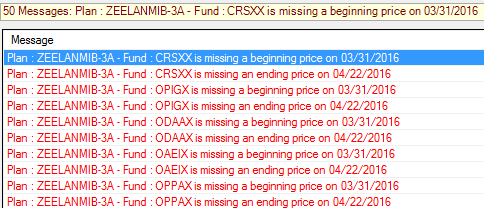
Note: If Investment Performance is turned on in Statement Configuration, but Morningstar data is NOT loaded prior to statement generation, the statement will still be generated, however, you will see the following errors:
7. For a web statement to be generated on a specified date:
· A prior ETL process must have been run for the date specified which extracts the data and generates the statement.
To run an ETL process:
o Go to Statements > Web Statements > Web Statement Run.
o
Select a Processing Option: ‘By Plan’, ‘By Participant’, or ‘All
Participants’. If ‘By Plan’ is selected,
highlight the Plan(s) in the ‘Available Plans’ box and click ![]() to move those Plans to the ‘Selected Plans’
box. If ‘By Participant’ is selected,
click
to move those Plans to the ‘Selected Plans’
box. If ‘By Participant’ is selected,
click ![]() to the right of the ‘Name’ box to search
for/select a participant.
to the right of the ‘Name’ box to search
for/select a participant.
o Enter a Statement Period From date and To date.
o
Enable the checkbox ‘Refresh all data as of the last run’.
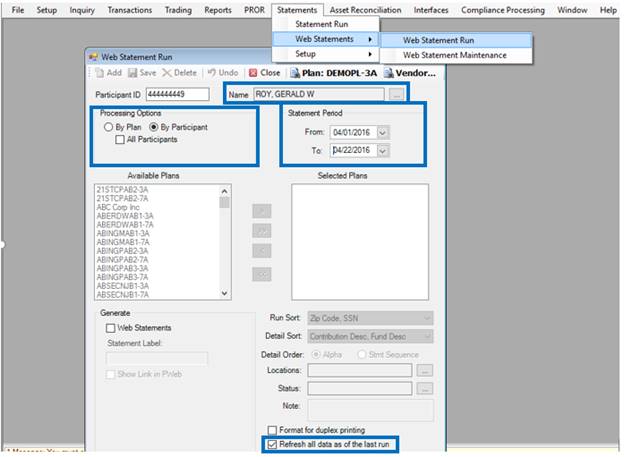
o Click <Process> to add the statement request to the job queue.
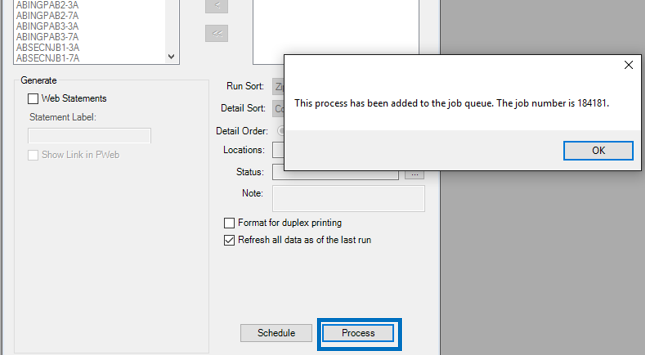
A message pops up indicating the process has been added to the job
queue. This ETL process creates
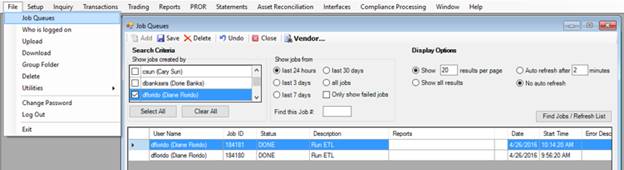
calculations and generates data in the specified format. To view the status of the job, go to File
> Job Queues.
Important Note: All daily fund prices must be loaded in order to run the ETL process. The daily fund prices upload is currently a function of operations and occurs on a regularly scheduled basis. If fund prices have not been loaded for the statement period specified, you will receive an error message(s) and your request will not be processed.
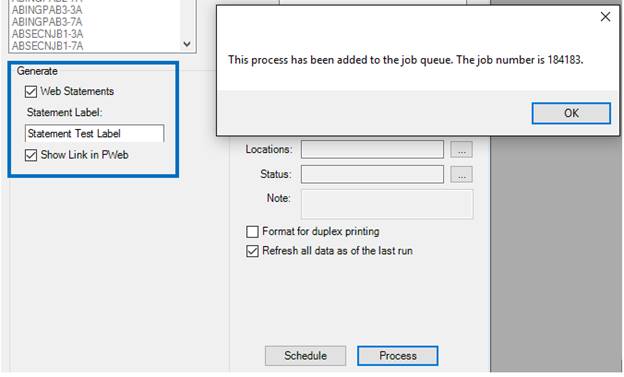
To generate a web statement, follow the previous steps to run an ETL process, however, prior to clicking <Process>:
o Enable the ‘Web Statements’ check box.
o Enter an optional Statement Label.
o Enable the ‘Show Link in PWeb’ check box, in order for participants to view the generated statement on PWeb.
o Click <Process> to add the statement request to the job queue.
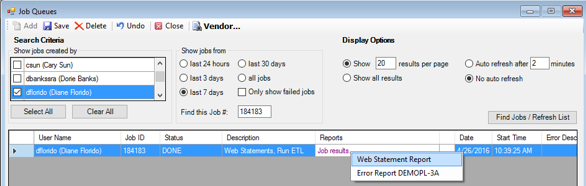
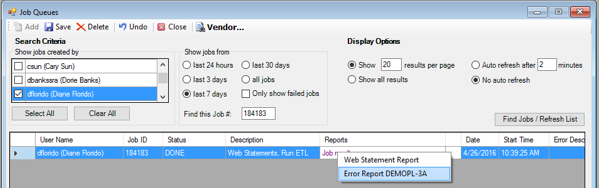
To view the status of the job, go to File > Job Queues.
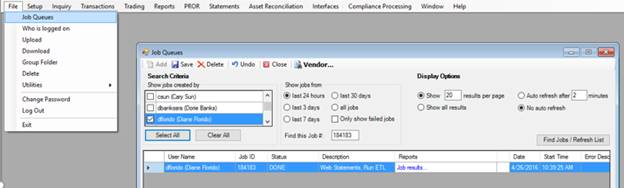
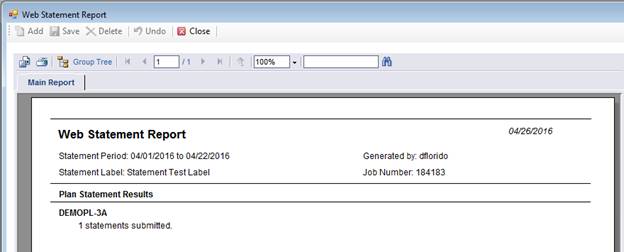
Click <Job results…> to view the Web Statement Report and/or Error
Report.
To view the generated statement in TSM:
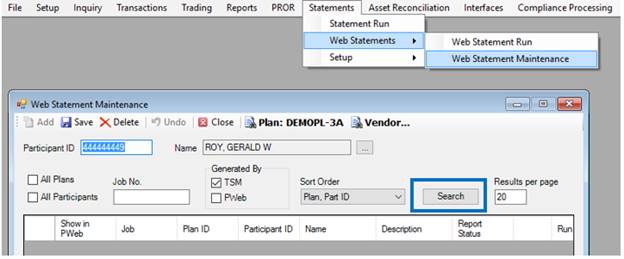
o Go to Statements > Web Statements > Web Statement Maintenance.
o Select the correct search criteria (e.g. Participant Name, Job No., All Plans, All Participants, Generated by TSM, etc.)
o Click <Search>.
Click<View> for the statement you wish to view.
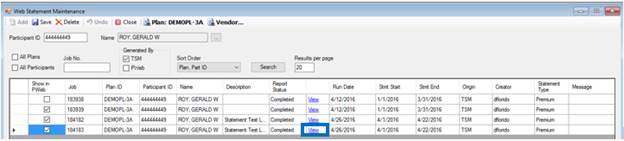
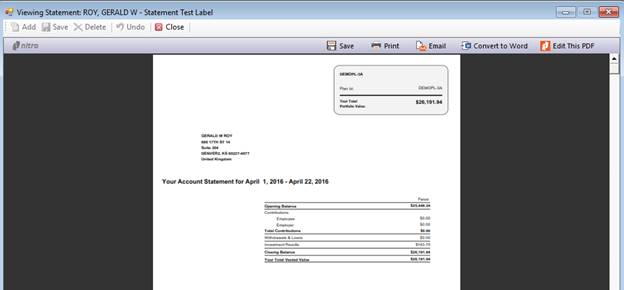
A separate window opens with the statement, where you can view,
save, print or email it.
To view the generated statement on PWeb:
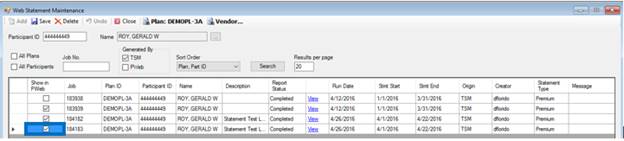
o Go to Statements > Web Statements > Web Statement Maintenance.
o Verify the ‘Show in PWeb’ checkbox is enabled for the statements to be viewed on PWeb.
o Login to PWeb.
o Go to OVERVIEW > STATEMENTS.
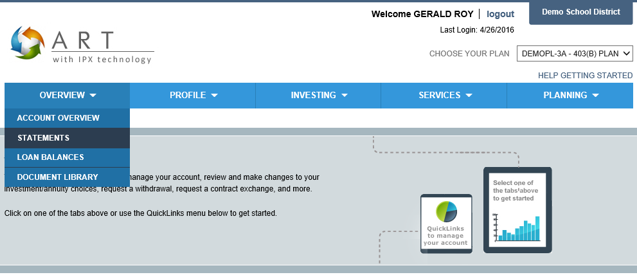
o Scroll down to see a list of generated statements.
o Click the View icon to view the desired statement.
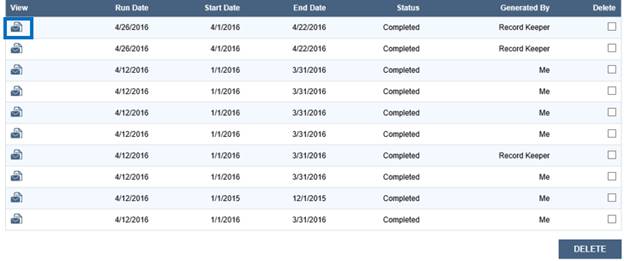
o
A separate window opens with the selected statement.